
Sour Cream Chocolate Layer Cake
Source: Maida Heatter's Book of Great Desserts (Andrews & McMeel Publishing, 1999 ed.), pg. 54.
One of these days, I'm going to learn to check my ingredients before baking. I thought I had learned this lesson but apparently not. As I was about to start, I realized that I was out of butter (of all things!). Actually I had 1 stick so I needed an additional 1/2 stick. Instead of running to the store, I decided to take a chance and use Smart Balance, which we did have on hand. The cake turned out fine although it was a tad dry. I don't think that was because of the Smart Balance, just probably overbaking time. As usual, this didn't take near as long as she said. She states 35 minutes in the recipe, my was overdone at 20 minutes. Be careful!
The icing is absolutely delicious. I also had to use Smart Balance for this. It was a little thick when I finished so I just added a bit more sour cream and it was fine.
I added the cherries on top simply because I had some candied ones in the pantry. This is totally optional!
3 oz. unsweetened chocolate
1/2 cup boiling water
2 cups sifted cake flour
1 1/2 tsp. baking powder
1 tsp. baking soda
1/4 tsp. salt
6 oz. (1 1/2 sticks) butter, softened
2 tsp. vanilla extract
1 cup sugar
2/3 cup light brown sugar, firmly packed
3 eggs
1 cup sour cream
Preheat to 375 degrees and adjust rack to center of the oven.
 |
| Butter two 9-inch cake pans and dust with fine, dry bread crumbs. |
 |
| Melt the chocolate with the boiling water over low heat. Set aside. |
 |
| Sift together the flour, baking powder, baking soda and salt. Set aside. |
 |
| Beat the butter slightly. |
 |
| Add the vanilla. |
 |
| Add the sugar... |
 |
| and the brown sugar. |
 |
| Beat in the eggs, one at a time, until mixed. |
 |
| Stir the sour cream into the cooled chocolate. |
 |
| Mix well. |
 |
| Add the chocolate mixture to the batter beating only until mixed. |
 |
| On low speed, add the sifted dry ingredients. Beat only until smooth. |
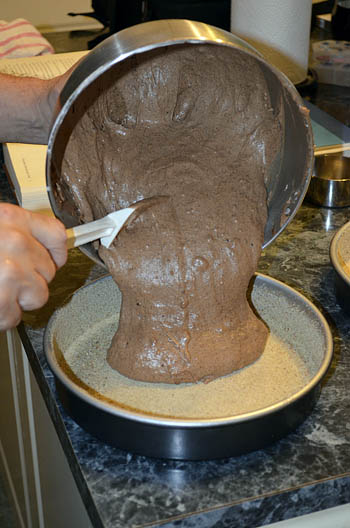 |
| Pour the batter into the prepared pans. |
 |
| Smooth the top of the batter, leaving the batter slightly lower in the center and higher on the sides. |
 |
| Bake 18-35 minutes until tops spring back when lightly touched and the layers come away from the pans. (I know this is a big time difference - see my introduction above for my experience on baking time). Cool in the pans for 5 minutes before removing from the pans. Let the layers cool completely. |
3 oz. unsweetened chocolate
2 TBS. butter
3/4 cup sour cream
1 tsp. vanilla extract
1/4 tsp. salt
1 lb. (3 1/2 cups, packed) sifted confectioners sugar
 |
| Melt the chocolate with the butter in a double boiler over barely simmering water. Set aside and allow to cool. |
 |
| In a bowl, add the vanilla and salt to the sour cream. |
 |
| Use an electric mixer to blend. |
 |
| Gradually beat in the confectioners sugar (scraping down the sides of the bowl as necessary). |
 |
| Add the cooled melted chocolate. |
 |
| Beat at high speed for 30 seconds or more until smooth. |
 |
| Spread a layer of filling over the first layer (Maida recommends turning the layer upside down which I didn't do). Place parchment paper or wax paper strips slightly under the cake to avoid a mess. |
 |
| Add the second layer, right side up. |
 |
| Cover the top and sides with the remaining icing. Carefully remove the strips of paper underneath. |
 |
| The cherries at totally optional! |

Comments
Who eats all this stuff you are baking? I know darn good and well you Michael can't stay as skinny as you are eating all these desserts! LOL