Thursday, December 16, 2021

Ethiopian Truffles


Ethiopian Truffles
Source: Maida Heatter's Book of Great Desserts (Andrews & McMeel Publishing, 1999 ed.), pg. 291.

I don't know where the name originated but these macaroon-like cookies are delicious and fun to make. A pastry dough is wrapped around a mixture of almonds and chocolate. There is a distinct almond flavor from almond extract as well. 

This recipe appears in her first book and the baking temperature is not noted. After doing a search, I found the recipe online which stated 375 as the temperature. However, they thought that was too much and reduced it to 325. I decided to take the middle route and baked them at 350. It took a long time and I was beginning to think they would never begin to brown. So, 375 sounds right to me. She does say to use double baking sheets to keep the bottom of the cookies from burning (an insulated cooking sheet might work as well).


Pastry

4 oz (1 stick) butter
1/4 tsp. vanilla extract
1/4 cup confectioners sugar
Pinch of salt
1 cup sifted all-purpose flour 

Line an insulated baking pan (or use two stacked pans) with parchment paper and set aside.

Beat the butter until softened. Add the vanilla, sugar and salt and mix. Add the flour and beat until incorporated. 

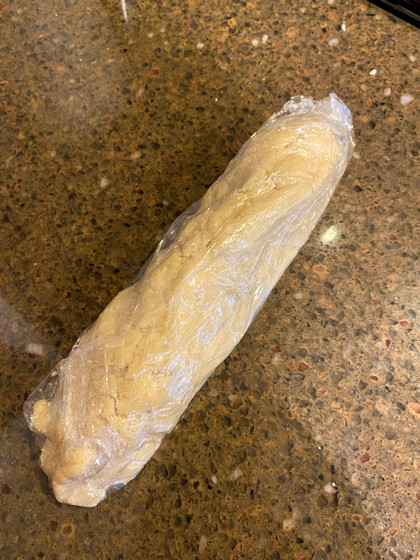
Form the dough into an oblong shape and wrap in plastic wrap. Refrigerate while you prepare the filling.


 Black Truffles

4 oz. (3/4 cup) blanched almonds
4 oz. semisweet chocolate
3 TBS. sugar
1/2 tsp. vanilla extract
1/4 tsp. almond extract
1 egg white

In a food processor, finely chop the almonds, chocolate and sugar (30 seconds - 1 minute).


With the processor running, add the vanilla and almond extracts and the egg white.


Transfer the mixture to a work surface and shape it into an oblong tube shape.


Cut into twenty pieces and roll into balls.


Retrieve the dough from the refrigerator and cut it into 20 pieces. Roll each piece and flatten it. Although the recipes says to do this with your hand, I had better success with a rolling pin. To do this, place the dough on a piece of wax paper and cover with another piece of paper. Gently roll the pieces until flattened. Use a spatula to lift them if they stick.


Place a ball of the filling on the dough. Use your finger to shape the dough around the filling. It does not have to cover the filling completely and will be more attractive if you can see both the dough and filling.


Roll them into a smooth ball and place on the cookie sheet about 1" apart.  Refrigerate for 20-30 minutes before baking.


Bake at 375  for 20 minutes or until the dough is lightly colored. Transfer to a rack to cool. After they have cooled, sprinkle with confectioners sugar if desired.


Sunday, December 12, 2021

Coconut Cream Pie


Coconut Cream Pie
Source: Maida Heatter's Pies & Tarts (Andrews & McMeel Publishing, 1997 ed.), pg. 56.

"My favorite desserts are pies and you never make them" is a common refrain I hear in this household. Well, I like pies too but I've always been hesitant about making them. Crusts and pastry are challenging and then you have the business of boiling mixtures at high temperatures for lengthy periods without burning anything (including yourself). The kitchen is always a huge mess after attempting one. I have vowed to do better and a few days ago, I made one of Michael's favorites - coconut cream pie.

It turned out fairly successful and the kitchen remained intact. After first reading the ingredients, I thought that the only double boiler I own would be too small for all the ingredients. Michael improvised a larger one using a dutch oven as the base and a large saucepan elevated on a small oval wire rack. However, I soon learned that this was not working as the mixture was not thickening. I realized that the steam was escaping around the saucepan and therefore it wasn't the best option. Lo and behold, I went back to my double boiler and the ingredients fit in it but it was close to the brim. Anyway, long story short, it worked. In doing all this, however, it took almost 30 minutes to get the filling completed!

My pie shell will not win any awards (I probably should have used a smaller pie plate) but it worked. As for the topping, Michael's favorite is Italian Meringue and he asked for it. I've used this recipe in the past and it works well although it makes too much for one pie. It is another tricky affair but so delicious.

Crust & Filling

1 9-inch baked pie shell (Maida's pie crust or use your own)
6 TBS. sifted all-purpose flour
1/2 cup granulated sugar
1/4 tsp. salt
2 cups milk
2 cups shredded coconut
2 egg yolks
1 TBS. unsalted butter
3/4 tsp. vanilla extract


Prepare the pie shell and set aside to cool while preparing the filling.


Sift the flour, sugar and salt together in the top of a double boiler. Slowly add the milk, whisking the mixture as you pour. Stir in the coconut.


Put enough water in the bottom portion of double boiler to cover the bottom (less than an inch). You don't want the water to touch the upper bowl. Turn the heat on to medium. It is okay to let the water come to a boil, although I usually turn it down once it reaches that point.

Stir the mixture and scrape the sides of the bowl as it cooks. Maida says to cover it and periodically stir so this is what I did (I usually do not cover a double boiler, however). Cook for 10 minutes and the mixture should begin to thicken. Allow it to cook another 10 minutes, stirring ever so often. Altogether, it should take around 20 minutes.

Place the egg yolks in a medium or large bowl and slowly add some of the coconut mixture, whisking as you do so. Add just a spoonful at a time until the egg yolks are warm and not in danger of cooking. Add about half of the coconut mixture and mix well. Now, turn the egg mixture into the remainder of the coconut mixture. Cook for an additional two minutes.


Remove from the heat. Add the butter, vanilla and almond extract and mix.

Transfer to a bowl to cool. After cooling, pour the filling into the pie shell.


Whipped Cream Topping

(Note: I didn't use this topping recipe but chose this Italian Meringue instead.)

1 cup heavy cream
2 TBS. granulated or confectioners sugar
1/2 tsp. vanilla extract
1/2 cup shredded coconut

Whip the cream, sugar and vanilla in a chilled mixing bowl with a chilled wire whisk until it holds a shape. 

Spread the topping over the pie and sprinkle with coconut. Refrigerate for 5-6 hours.


Tuesday, December 7, 2021

English Butter Cookies


English Butter Cookies
Source: Maida Heatter's Best Dessert Book Ever (Andrews & McMeel Publishing, 1997 ed.), pg. 269.
 
In the introduction to this recipe, Maida says that Martha Washington made these cookies and they were called "Shrewsbury Biscuits".  I found various recipes for the Shrewsbury Biscuits and they were all slightly different from this one but pretty close. The main difference was that they called for lemon zest and raspberry preserves. This recipe yields a plain but very tasty cookie and one that gets better with age. 
 
I don't think I've ever made a cookie for the Christmas tree but I decided to put holes in some of them and try it. I used a straw and it works great. The cookies are very firm, right out of the oven, and they make wonderful ornaments. They are better, however, in your mouth!

5 cups sifted all-purpose flour
1/2 tsp. salt
1 1/2 tsp. cinnamon
3/4 tsp. cloves
3/4 tsp. allspice
1/2 tsp. ginger
12 oz. (3 sticks) butter, softened
1 tsp. vanilla extract
1 1/2 cups granulated sugar
3 large eggs

Preheat the oven to 350. Line cookie sheets with foil or baking paper.

Sift together the first six ingredients and set aside.


Beat the butter until softened. Add the vanilla.


Add the sugar.

 
Add the eggs, one at a time, mixing well.


Add the flour mixture. (This is a lot of flour so add it slowly on low speed)


The dough will be thick but not too sticky and easy to work.


Turn the dough out onto a lightly floured surface.


Cut the dough into three pieces.


Roll the dough out to approximately a 1/4 inch thickness.


Ready for the oven! Bake for 15-20 minutes or until the edges are lightly golden around the edges and pale in the center.


Transfer to a wire rack to cool and store in an airtight container. Maida says these improve daily. They are very firm and crisp and would make nice gifts to friends and neighbors.