Saturday, June 30, 2012

Crumb Crust

Crumb Crust

(This is Maida's recipe for a basic graham cracker crumb crust. I have tried this recipe twice with dismal results. I think it simply too much work and I've never been able to get the crust to stay together. The crust is dry so perhaps adding more butter might make it more moist. But really, a graham cracker crust is easy to do without going to this much trouble. Here is a good one.)

1 1/4 cups graham cracker crumbs
1/4 cup granulated sugar
Scant 1/4 tsp. nutmeg
2 oz. (1/2 stick) unsalted butter, melted

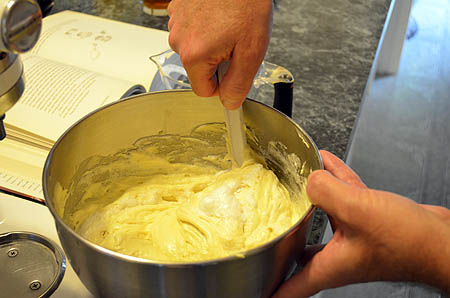
Adjust a rack to the center of the oven and preheat oven to 375°.  In a bowl, mix the crumbs with the sugar and nutmeg.  Then add the butter and stir with a rubber spatula until the butter is evenly distributed; the mixture will not hold together.  Although the crumb mixture can be pressed into place directly in the pie plate, I line the plate with foil first, and then remove the foil before filling the crust.  This guarantees easy serving - the crust cannot stick to the plate.  It is a bit more work (or play) but I think well worth it.

For a 9-inch pie plate (I use a glass one), use a 12-inch square of foil.  Turn the plate over on a work surface.  Place the foil shiny side down over the outside of the plate and, with your hands, press it firmly against the plate all around.  Remove the foil.  Turn the plate over again and place the shaped foil in the plate.  Press the foil firmly into place in the plate with a potholder or a folded towel.  Fold the edges of the foil down over the rim of the plate.

Turn the crumb crust mixture into the foil-lined plate.  Using your fingertips, distribute the mixture evenly and loosely over the sides first and then the bottom.  Then press the crust firmly and evenly on the sides, pushing it up from the bottom a bit to form a rim slightly (barely) higher than the edge of the pie plate.  Be careful that the top of the crust is not too thin.  To shape a firm edge, use the fingertips of your right  hand against the inside and press down against it with the thumb of your left hand.  After pressing the sides and the top edge firmly, press the remaining crumbs evenly and firmly over the bottom.  There should be no loose crumbs.

Bake for 8 minutes.  Then cool to room temperature.

Freeze for at least 1 hour, overnight if possible.  It must be frozen solid.

Remove from the freezer.  Raise the edges of the foil and carefully lift the foil (with the crust) from the plate.  Gently peel away the foil as follows: Support the bottom of the crust on your left hand and peel away the foil, a bit at a time (do not tear the foil) with your right hand.  As you do so, rotate the crust gently on your left hand. 

Supporting the bottom of the crust with a small metal spatula or a table knife, ease it back into the plate very gently in order not to crack it.  It will not crack or crumble if it has been frozen long enough.

Wednesday, June 27, 2012

Peanut Bars

Peanut Bars Source: Maida Heatter's Book of Great Desserts (Andrews & McMeel Publishing, 1999 ed.), pg. 219.

These are thin cookie bars with a caramel base and topped with peanuts. They are made in a saucepan. They are very crisp. I think they are better the day after they are made.

3/4 cup sifted all-purpose flour
1 tsp. cinnamon
1/2 tsp. powdered ginger
1/4 lb. (1 stick) butter
6 oz. (1 cup) butterscotch morsels
1 1/2 tsp. instant coffee
1/4 cup sugar
1 egg
3 oz. (3/4 cup) salted peanuts, chopped coarse (prefably the dry-roasted type)

Adjust rack to center of oven. Preheat oven to 325 degrees. Line a 10 1/2 x 15 1/2 x 1 inch jelly-roll pan with aluminum foil as follows: Turn the pan upside down. Cover with a piece of foil large enough to fold down on all four sides and fold the edges just to shape them. Remove the foil. Invert the pan. Sprinkle a few drops of water in the pan to keep the foil in place. Place the foil in the pan. Use a folded towel or a pot holder to press the foil firmly against the pan. Brush the foil with soft or melted butter. Place in freezer or refrigerator. (Chilling the pan makes it easier to spread the thin layer of dough).

Sift together the flour, cinnamon and ginger and set aside.
Place the butter and butterscotch morsels in a 2 1/2 to 3 quart saucepan over moderate heat. Stir occasionally until melted.
Stir in the instant coffee.
Remove from heat and stir with a wire whisk until smooth.
With a rubber or wooden spatula stir in the sugar and sifted dry ingredients.

In a small bowl stir the eggs briefly with a fork just to mix and add it to the batter.

Stir until smooth.
Turn the batter into the chilled pan and, with the back of a large spoon, spread as level as possible. It will make a very thin layer.
Sprinkle with the peanuts.
Bake for 25 minutes until top is golden-colored and springs back when lightly touched. Remove from oven and cool in pan for only 3 minutes. Cover with a large cookie sheet. Invert and remove pan and foil. Cover cake with another large cookie sheet and invert again. With a long, sharp knife, cut the warm cake into bars, cutting down firmly with the full length of the blade. WIth a wide metal spatula, transfer bars to a rack to cool.

Wednesday, June 20, 2012

Spanish Orange Cake (Valencian)


Spanish Orange Cake
Source: Maida Heatter's Book of Great Desserts (Andrews & McMeel Publishing, 1999 ed.), pg. 132.

There are 3 recipes for orange cakes in Maida's "Book of Great Desserts". In addition to this one, there is a "Texan" orange cake and one called "Indian River Sweet Orange Bread". I opted to try this
"Spanish Orange Cake" first. I love the flavor of orange in baking, especially when combined with chocolate. This does not have chocolate in it. It is more like a pound cake, very light and delicate on the orange flavor, and very satisfying. I will have to try the other two recipes and compare them. This one is a definite keeper!


2 1/2 cups sifted all-purpose flour
1 TBS. plus 1 tsp. baking powder
1/4 tsp. salt
1/2 lb. (2 sticks) butter
1 1/2 cup sugar
2 eggs, separated, plus 3 egg yolks (that is a total of 5 egg yolks and 2 egg whites)
2/3 cup orange juice (before squeezing juice, grate and reserve rind of 2 oranges to use below)
Finely grated rind of 2 oranges

Adjust rack one-third up from the bottom of the oven. Preheat oven to 350 degrees. Butter a 9 x 3 1/2-inch tube pan and dust it with fine, dry bread crumbs.


Sift together flour, baking powder and salt. Set aside. In large bowl of electric mixer beat the butter to soften it a bit. Remove and reserve a few tablespoons of the sugar. Add the remaining sugar to the butter and beat for 2 to 3 minutes. 


One at a time, beat in the five egg yolks, beating well after each, and scraping the bowl with a rubber spatula as necessary to keep mixture smooth. 


On lowest speed alternately add sifted dry ingredients in three additions and the orange juice in two additions, continuing to scrape the bowl with a rubber spatula as necessary and beating only until smooth after each addition. Remove from mixer. 


Stir in orange juice and rind.


Beat the 2 egg whites until they hold a soft shape. 


Add the reserved sugar and beat until the whites hold a firm shape and fold them into the batter.


Turn the batter into the cake pan and level top by turning pan briskly back and forth.


Bake 1 hour or until cake tester comes out dry. Cool cake in pan for about 20 minutes. Cover with a rack and invert. Remove pan, leaving cake upside down. Place over wax paper or aluminum foil.

Prepare the following glaze:

1/2 cup orange marmalade
2 TBS. water

Mix marmalade and water in a small saucepan. Bring to a boil. Brush over top and sides of cake. Let stand several hours before transferring to a cake plate, using a flat-sided cookie sheet as a spatula. (The mixture will be watery and thin - don't worry, it works fine!)

Monday, June 18, 2012

Frozen Chocolate Pie


Frozen Chocolate Pie
Source: Maida Heatter's Book of Great Chocolate Desserts (Andrews & McMeel Publishing, 2006 ed.), pg. 236.

(Note: This recipe calls for uncooked eggs)

A very simple and delicious recipe for chocolate lovers. I have not attempted Maida's pie shell recipe yet so I used a bought frozen one for this recipe. I do plan to tackle her recipe soon (although it is scary looking!). I must confess that I have grown accustomed to Ina Garten's recipe which is very easy and good.

1 9-inch baked and cooled pie shell
2 oz. (2 squares) unsweetened chocolate
4 oz. semisweet chocolate
1/4 lb. (1 stick) sweet butter
1 tsp. vanilla extract
Optional: 1 TBS. rum, Cognac, or strong prepared coffee
3/4 cup strained confectioners sugar
4 eggs (graded extra-large or jumbo)


Place both chocolates in the top of a small double boiler over hot water on moderate heat. Melt the chocolate and set aside to cool.
Cream the butter until it is soft. Add the vanilla, optional rum, Cognac or coffee and the confectioners sugar and beat until soft and creamy.
Add the cooled melted chocolate.
Add the eggs one at a time. Mix well, scraping the bowl occasionally with a rubber spatula. After the last egg has been added, beat for 1 minute more.
Pour the mixture into the pie shell.
Spread it to make an even layer and place it in the freezer. Let it sit for about 15 minutes. Remove from the freezer, wrap in plastic wrap and return to the freezer for 4 hours or more. Before serving, let it stand at room temperature for about 15-20 minutes.
Topping

1/2 oz. semisweet or milk chocolate
1 cup heavy cream
Scant 1 tsp. vanilla extract
3 TBS. strained confectioners sugar

Make shaved chocolate curls (they can be made ahead of time and stored in the refrigerator or freezer). Working over wax paper, with a vegetable peeler scrape the side of the chocolate, forming curls.

The whipped cream may be made just before serving or a few hours before. (If it has to stand, refrigerate it; it will separate slightly and should be stirred with a wire whisk just before using.)

Place the cream, vanilla and sugar in a chilled small bowl. With chilled beaters, whip until the cream is stiff enough to hold a shape.

Immediately before serving spread the cream over the top of the pie and, with a large spoon, sprinkle the chocolate curls over the top.

Use a sharp, heavy knife and serve in small portions.


Monday, June 11, 2012

Toni's Pound Cake

Toni's Pound Cake
Source: Maida Heatter's Book of Great Desserts (Andrews & McMeel Publishing, 1999 ed.), pg. 157.

If you are wondering if I have abandoned this blog, fear not! I've just been busy with gardening and other matters. I knew I would slow down during the spring and summer months because I'm so busy with gardening but once it gets hot and sticky, I'll probably be back in the kitchen. 

I made this pound cake last weekend and ran it by Michael who says pound cake is one of his favorite desserts. This one passed with flying colors. We served it with strawberries and blueberries that has been flavored with Splenda and Grand Mariner.

The recipe is named after Maida Heatter's late daughter, who said this was her favorite.

Rind of 2 lemons, grated fine
3 TBS lemon juice
1 lb (4 sticks) butter
1 TBS vanilla extract
3 1/3 cups sugar
1/2 tsp mace
10 eggs
4 cups sifted all-purpose flour 


Adjust rack one-third from the bottom of the oven. Preheat oven to 350 degrees. Butter a 10x4 inch tube pan, line the bottom with paper cut to fit, butter the paper, and dust it all lightly with fine dry bread crumbs.


Grate the rind of 2 lemons. Mix the rind with the lemon juice and set aside.


In large bowl of an electric mixer, beat the butter to soften it a bit.
Add vanilla.
Gradually add the sugar and mace. Beat at moderately high speed for two to three minutes, scraping the bowl as needed to keep ingredients well mixed.
Add eggs, two at a time, beating until thoroughly incorporated after each addition.
On lowest speed, gradually add the flour, scraping the bowl with a rubber spatula and beating only until smooth. Remove from the mixer and stir in the lemon rind and juice.


Turn the batter into prepared pan. Turn pan briskly back and forth to level the top.
Cover the top of the pan with a piece of aluminum foil large enough to fold down loosely over the sides of the pan.
Bake for 30 minutes. Open oven door just enough to reach in and remove the foil. Continue baking for additional 1 1/4 hours. (Total baking time is 1 3/4 hours)* Cake is done when tester comes out dry.


Cool in pan on a rack for 10 to 15 minutes. Cover with a rack and invert. Remove pan and paper. Cover with a rack and carefully invert again to finish cooling right side up.


(My notes: As usual, the cake didn't take as much time to bake in my oven. It was done about 12 minutes sooner than the recipe required. So, know your oven! It came out of the pan beautifully. If you like your cake very tart (Michael does), just add a few more tablespoons of lemon juice. I actually added about 5 tablespoons and the lemon flavor was still rather subtle.)