St. Louis Chocolate Layer Cake
Source: Maida Heatter's Book of Great Chocolate Desserts (Andrews & McMeel Publishing, 2006 ed.), pg. 52.
This is a light devil's food cake with the most delicious old-fashioned marshmallow icing. I took part of this cake to work where it got many rave compliments. This cake cannot be froze after it has been iced. A great cake for a special occasion!
If you are using a stand mixer and have two bowls, that will save you time since you will need to beat the egg whites in a clean bowl. I always put the bowl I will use for beating egg whites in the freezer along with the whisk attachment while I'm preparing the first part of the cake. Then I retrieve the bowl from the freezer when I get to the egg whites preparation. The cold bowl and whisk make them whip easier.
The icing may sound scary to make but it is actually not too difficult if you follow the instructions exactly. In the book, the recipe for the icing is almost an entire page and looks quite intimidating. I have condensed it quite a bit but still included all the crucial steps. It is advisable to have everything ready and at your fingertips. You will need a candy thermometer.
Cake
1 3/4 cups sifted all-purpose flour
2 tsp. baking powder
1/8 tsp. salt
2 oz. (2 squares) unsweetened chocolate
1/3 cup water
6 oz. (1 1/2 sticks) butter
1 1/2 cups granulated sugar
3 large eggs, separated
3/4 cup milk
Preheat oven to 375. Butter 2 9-inch round layer cake pans and dust with flour. Set aside.
Sift together the flour, baking powder and salt.
 |
| Place the chocolate squares and water in a small saucepan over low heat until the mixture has melted. Set aside to cool slightly. |
 |
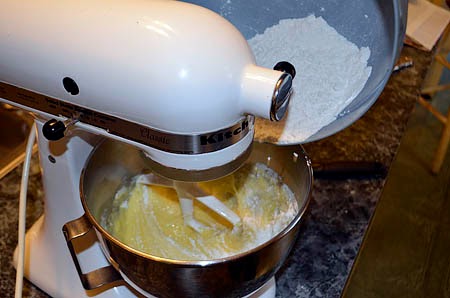
| In a mixing bowl, cream the butter. Add the sugar and mix well. |
 |
| Add the egg yolks and beat until well mixed. Scrape the bowl as necessary. |
 |
| Add the chocolate and mix well. |
 |
| On low speed, add the sifted dry ingredients... |
 |
| alternating with the milk in two additions. Mix well and set aside. |
 |
| In a clean mixing bowl, beat the egg whites until they hold a firm shape but are not dry. |
 |
| Fold the egg whites into the chocolate mixture. |
 |
| Divide the batter between the two prepared pans. Smooth the tops. Bake for 15-25 minutes, depending on your oven temperature. The cakes are done when they barely spring back after being lightly pressed with your fingertip. Do not overbake. |
Let the layers cool for about 15 minutes before transferring to a wire rack to cool completely.
Marshmallow Icing
1 1/2 cups granulated sugar
2/3 tsp. cream of tartar
2/3 cup water
1/8 tsp. salt
2/3 cup egg whites (from 4-5 eggs)
1 1/4 tsp. vanilla extract
Place the sugar, cream of tartar and water in a saucepan capable of holding 6 cups (so that the candy thermometer will reach the mixture). Stir with a wooden spoon until the sugar is dissolved and the mixture starts to boil. Cover and let boil for 3 minutes.
Uncover and insert the candy thermometer. Adjust the heat to high and let the mixture boil without stirring until it reaches 242 degrees.
Shortly before it reaches the required temperature, add the salt to the egg whites and beat them until they are stiff.
 |
| When the syrup is ready, increase the speed of the mixer to high and add the syrup to the egg whites in a steady stream. |
 |
| Continue beating the egg whites about 4-5 minutes until the icing is thick and stiff. Mix in the vanilla. |
 |
| It is okay to start using the icing while it is still warm (the cake, of course, should be fully cooled). To avoid a mess, place pieces of parchment paper underneath the cake layer and pull them out after the entire cake has been iced. Spread 1/3 to 1/2 inch thick between the layers. |
 |
| Top with the remaining layer and finish icing the sides
and top. You can form the icing into swirls and high peaks, it will stay
in place nicely. You can also use a pastry bag. |
Yum