Thursday, September 4, 2014

Chocolate and Peanut-Butter Ripples


Chocolate and Peanut-Butter Ripples
Source: Maida Heatter's Brand-New Book of Great Cookies (Random House, 1995 ed.), pg. 47.

These cookies taste like chocolate peanut butter cookies. I thought that the ripple effect might be more pronounced but they are not and they appear mostly at the edges of the cookie. They are still quite yummy, easy to make but somewhat time consuming. The cookies appear soft but they become crisper as they cool. They are fragile and do not travel well.

Chocolate Dough

2 oz. unsweetened chocolate
4 oz. (1 stick) unsalted butter
1 tsp. vanilla extract
1/4 tsp. salt
3/4 cup granulated sugar
1 egg
1 cup sifted all-purpose flour

Preheat the oven to 325 and line several cookie sheets with parchment paper.

Melt the chocolate in the top of a double boiler and set aside.

Cream the butter and add the vanilla, salt and sugar and beat well.

Add the melted chocolate.

Add the egg.
On low speed, add the flour and beat until smooth.


Peanut-Butter Dough

2 TBS. unsalted butter
1/4 cup smooth peanut butter
1/2 cup light brown sugar
2 TBS. sifted all-purpose flour 

The peanut-butter dough can be mixed in a small bowl with an electric mixer. Mix the peanut butter with the butter.

 
Add the brown sugar and the flour.


Shaping the Cookies

Divide the chocolate dough in half.

Drop one half of the chocolate dough by teaspoons about 2 inches apart
onto the parchment paper lined cookie sheets.
Top each mound with a teaspoon-sized portion of the peanut-butter dough.


Now top again with the chocolate dough mixture that you set aside.

Flatten slightly with a fork.

Bake for about 15 minutes, reversing your pans about half-way through. Let them cool on the sheets for a minute or so until they are firm enough to transfer to a rack.

Thursday, August 28, 2014

Chocolate Sponge Cake


Chocolate Sponge Cake
Source: Maida Heatter's Cakes (Andrews & McMeel Publishing, 2011 ed.), pg. 71.

The directions for this cake were so odd that I found myself doing a double-take and re-reading them over and over. Apparently though (unless there were typos in the book), they are correct - the long beating time for the eggs, using a wet pan, and adding the sugar only one tablespoon at a time - very odd. I am still not sure if I did it all correctly - the cake did not rise up in the pan as much as she said it would (almost to the rim) but the taste was wonderful. It is very light, as a sponge cake should be, and has a very mellow chocolate flavor. We ate it with strawberries. Delicious!

3/4 cup sifted cake flour
1/2 tsp. salt
1 tsp. cinnamon
2 tsp. powdered instant coffee or expresso
1/4 cup unsweetened cocoa powder (preferably Dutch-process)
6 eggs
2 tsp. vanilla extract
1 cup granulated sugar

Preheat the oven to 325. Place a 10x4 inch angel-food tube pan (the kind with a loose rim) in the sink (for later).

Sift together the flour, salt, cinnamon, expresso (or coffee powder) and cocoa. Resift it six more times.
 
Beat the eggs with the vanilla at high speed until the eggs rise to the top of the bowl.

Transfer the eggs to a mixer bowl and whisk at high speed for about 12-15 minutes until the eggs have thickened.


Still whisking, add the sugar one tablespoon at a time (this will take about 3 minutes).
Lower the speed of the mixer and add the sifted cocoa mixture, one tablespoon at a time. Do not beat longer than necessary or you will deflate the eggs.


Run cold water into the cake pan, then pour it out, leaving the pan wet.


Pour in the batter.
Bake for 40 to 50 minutes until the top springs back when lightly pressed.
After the cake comes out of the oven, turn it upside down
on a wire rack and let it cool completely. Use a sharp knife to cut around
the edges of the pan to remove it.

Wednesday, July 23, 2014

Blueberry Surprise Cake


Blueberry Surprise Cake
Source: Maida Heatter's Cakes (Andrews & McMeel Publishing, 2011 ed.), pg. 198.

I have been trying for years to grow blueberries at my mother's house but apparently they don't like the soil there. They produce a few berries but the bushes just do not seem to want to grow. Fortunately, I have friends who give me blueberries! I received 2 bags of frozen berries recently and checked Maida's book to see what I could make with them. I decided to try this cake and it was so good! Not too sweet, very reminiscent of a coffee cake. It is a recipe that I will be doing again for sure.

Blueberry Filling

1 cup fresh blueberries
3 TBS. granulated sugar
1 tsp. cinnamon
1/4 tsp. nutmeg
1 tsp. lemon juice (before squeezing the juice, zest the lemon and reserve it for the cake)

Cake

2 cups sifted all-purpose flour
2 tsp. baking powder
1/4 tsp. salt
8 oz. (2 sticks) unsalted butter
1 tsp. vanilla extract
1 1/3 cups granulated sugar
2 eggs
1 cup sour cream
Finely grated rind of 1 lemon (reserved from the filling)
1/3 cup toasted pecans, cut into medium-sized pieces

 
First, prepare the blueberry "surprise" (the filling) by combining the sugar, cinnamon and nutmeg. Lightly toss the berries and let them stand. I added a bit of flour to mine in case they wanted to sink to the bottom of the cake.

To make the cake:

Preheat the oven to 350. Butter a 9x3 springform pan and dust it with fine breadcrumbs. Set aside.

Sift together the flour, baking powder and salt and set aside.


Beat the butter until soft and add the vanilla and sugar.
Add the eggs, one at a time, until incorporated.
Add the sour cream and beat only until incorporated (scrape the sides of the bowl to mix it well).
On low speed, add the flour mixture and beat until smooth.
Remove the bowl from the mixer and stir in the grated lemon zest.
Add half of the mixture to the pan and smooth it out.
Now add the blueberries over the top leaving them about
1 1/2 inches away from the sides of the pan.
Add the pecans to the remaining batter and mix well.
Now add the remaining batter on top of the blueberries and spread it until smooth.
Bake for 60 - 70 minutes until the cake springs back when lightly pressed with your fingertip. Let the cake stand for about 15 minutes while you prepare the glaze.

Glaze

1 cup confectioner's sugar
1 TBS. lemon juice
A few drops boiling water

Whisk the sugar and lemon juice and a few drops of boiling water to make it semi-liquid. The mixture should be thick and barely thin enough to pour.

Release the cake from the springform pan and turn it out onto a baking rack. Drizzle the glaze over the cake and let it run down the sides. (Place a piece of parchment or wax paper underneath to avoid a mess).


Tuesday, June 24, 2014

Heath Bar Peanut Butter Cookies


Heath Bar Peanut Butter Cookies
Source: Maida Heatter's Brand-New Book of Great Cookies (Random House, 1995 ed.), pg. 103.


I cannot resist cookies made with candy bars and these are at the top of the list. You do not necessarily have to use Heath Bars. You can use any semi-sweet chocolate - just cut it into small chunks or pieces.

14 oz. miniature Heath bars
1 1/2 cups sifted unbleached flour
1/2 tsp. baking powder
1/2 tsp. baking soda
4 oz. (1 stick) unsalted butter (softened)
1/2 cup smooth or chunky peanut butter
1 tsp. vanilla
1/2 cup packed light brown sugar
1/2 cup granulated sugar
2 large eggs
1 cup salted peanuts

Preheat oven to 350. Line cookie sheets with parchment paper or aluminum foil.


Cut each candy bar into six pieces.


Sift together the flour, baking powder and baking soda. Set aside.


Beat the butter until soft.


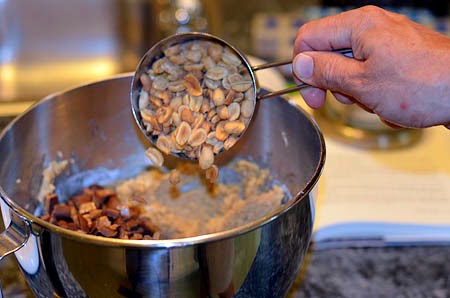
Add the peanut butter...


and the vanilla. Mix well.
Add both sugars - the white and the brown - mix well.
Add the eggs, one at a time, until mixed.
Add the sifted flour mixture on low speed, just until incorporated.
Remove the mixer bowl from the mixer stand and add the candy bar pieces.
Add the peanuts.
Stir until mixed.
Use an ice-cream scoop or a tablespoon to make mounds of cookie dough about 2 inches apart on the cookie sheet.
Slightly press each mound with a wet fork.
Bake the cookies about 12-14 minutes, reversing the pans about half-way through, until they are lightly colored. Do not overbake. Transfer to a cooling rack with a metal spatula. Store in an airtight container.