Friday, December 5, 2014

Date-Nut Rocks


Date-Nut Rocks
Source: Maida Heatter's Cookies (Andrews & McMeel Publishing, 1997 ed.), pg. 87.

These cookies are thick and soft and have a nice subtle flavor. Be careful not to overbake. I burned the bottoms of the cookies on my first batch. I would recommend setting your timer a a few minutes before the designated time (18 minutes) and take them out early. The batter is very light in color and easy to work with. I always use an ice-cream scoop for forming the dough. It makes it so much easier. I used pecans for the nuts but walnuts are fine as well.

I had dates in the cabinet from earlier in the year and wondered if they were still okay to use. I was reading the box and noticed that it said it was best to refrigerate after opening. I learned something new! I used the dates anyway as well as some fresher ones and they turned out okay.  


2 cups sifted all-purpose flour
1/2 tsp. baking soda
2 tsp. baking powder
Pinch of salt
1 tsp. allspice
4 oz. (1 stick) unsalted butter
1 tsp. vanilla extract
1 cup light brown sugar, firmly packed
2 eggs
1/2 cup sour cream
2 cups pitted dates, cut into 3 or 4 pieces
2 cups pecans or walnuts, coarsely broken

Preheat the oven to 375. Line cookie sheets with parchment paper.

Sift together the flour, baking soda, baking powder, salt and allspice and set aside.

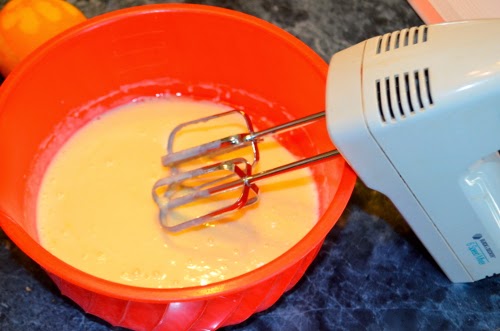
Cream the butter, beat in the vanilla and sugar. Add the eggs, one at a time, and beat well. 

Lower the speed of the mixer and add half of the flour mixture followed by the sour cream. Add the remaining flour mixture and mix well. 

Remove the bowl from the mixer.
 
Stir in the chopped dates.

Stir in the pecans (or walnuts).
Place tablespoons of the dough onto the lined pans, spacing them about 2" apart. Bake for 14-18 minutes. The cookies are done when they are lightly colored and spring back when pressed. Be careful not to overbake! Transfer to a wire rack to cool.


Wednesday, November 26, 2014

Kathy's Cranberry Loaf

 
Kathy's Cranberry Loaf
Source: Maida Heatter's Cakes (Andrews & McMeel Publishing, 2011 ed.), pg. 202.

This is a pretty loaf cake full of nuts and made with either fresh or frozen cranberries (I used frozen). There is actually very little "cake" in between because of all the nuts and berries but it is good. An orange glaze is brushed over the cake after baking which gives it an extra zing. The loaf will not be a tall one, therefore, don't use a large loaf pan or it will be really thin. Use one that measures around 4x8x2. This recipe will make 2 loaf cakes. This is best baked a day ahead. They can also be frozen and served weeks later.

2 cups whole cranberries (fresh or frozen)
2.5 cups sifted all-purpose flour
1/4 tsp. salt
1 tsp. baking powder
1 cup sugar
2 cups walnuts (cut into large pieces)
2 eggs
1 cup buttermilk
3/4 cup vegetable oil
Finely grated rind of 1-2 oranges (reserve juice for glaze)

Orange Glaze
1 cup sugar
1 cup orange juice 


Make the glaze after the cakes have baked and are resting. Stir the sugar and orange juice together over moderate heat in a small saucepan until the sugar has dissolved.

Butter 2 4x8x2 loaf pans and dust them with fine, dry bread crumbs. Preheat oven to 350.

In a large bowl, sift together the flour, salt, baking powder and sugar. Stir in the nuts and the cranberries.
Beat the eggs slightly, then beat in the buttermilk and vegetable oil. Stir in the orange rind.

Pour the egg mixture over the dry ingredients.

Stir lightly to mix.

 
Divide the batter equally into the loaf pans and smooth the tops. Bake for 1 hour or until a toothpick inserted in the middle comes out clean. After 45 minutes, check the cakes - if the tops look pale, move the pans up to the higher rack. You will see a crack form down the middle top of the cakes.


Remove the cakes from the oven and let them sit about 10 minutes. Remove from the pans and place on a cooling rack with parchment paper spread below. Brush the loafs generously on all sides with the hot orange glaze. Refrigerate for several hours before serving or go ahead and freeze them.


Friday, October 17, 2014

Apple Cake from the Catskills


Apple Cake from the Catskills
Source: Maida Heatter's Best Dessert Book Ever (Andrews & McMeel Publishing, 1997 ed.), pg. 121.

Well, I blundered a bit on this recipe but it did not affect the deliciousness of the cake. I was getting ready to put the batter in the pan and I realized that I had not used the reserved sugar and spice mixture. I quickly looked over the recipe but could find no mention of what to do with the reserved sugar mix. Thinking there was a mistake, I just added the sugar mixture to the batter and mixed it in. Sloppiness on my part, I confess, because after I looked at the recipe a third time, there it was - the sugar mix was supposed to have been sprinkled over the layer of apples in the pan. Oh well, like I said, the cake was wonderful anyway. This does bring up an important step - read the entire recipe before you begin. I read the recipe about a week before I made it and should have re-read the thing before starting. 

I used Granny Smith apples and brandy for the recipe (you can use any tart apple and instead of brandy - Calvados, applejack or apple juice).

3 cups sifted unbleached flour
3 tsp. baking powder
1 tsp. salt
2 1/3 cups granulated sugar
2 tsp. cinnamon
1/2 tsp. nutmeg
1/2 tsp. ground ginger
1 3/4 (5-6 medium-sized) tart apples
4 large eggs
1 cup canola oil (or vegetable oil)
2 tsp. vanilla extract

1/3 cup Calvados, applejack, brandy or apple juice
2 oz. walnuts, cut into medium-sized pieces
1/2 cup raisins
Confectioners sugar (to sprinkle on top before serving)


Preheat the oven to 350. Use a large Bundt pan or a tube pan (with 13-14 cup capacity). Butter the pan and dust it with fine bread crumbs.

Sift together the flour, baking powder, salt and set aside.
Peel and core the apples and cut them into small pieces.

Mix 1/3 cup of the sugar (reserving the remaining 2 cups) with the cinnamon, nutmeg, and ginger.
Beat the eggs in the mixer. Beat in the oil, vanilla and brandy.
Add the 2 cups of plain sugar.
On low speed, add the sifted dry ingredients until smooth.

Pour half of the batter (about 2 cups) into the pan, smooth the top and sprinkle with half of the walnuts, raisins, apples and cinnamon sugar.
Repeat with the remaining batter, walnuts, raisins, apples and cinnamon sugar.


Cover the pan tightly with foil.

Bake for 25 minutes, remove the foil, and bake for another hour. Cover the pan loosely with foil during the last 15 minutes to prevent overbrowning. (The recipe says to bake for 1 hour and 40-50 minutes - this is way too long!). Check the cake with a tester - it will be done with the tester comes out clean.
Cool in the pan for 20 minutes, then cover with a flat plate and flip it to remove. Let cool completely and sprinkle with confectioners sugar.

Sunday, October 5, 2014

Budapest Coffee Cake


Budapest Coffee Cake 
Source: Maida Heatter's Book of Great Desserts (Andrews & McMeel Publishing, 1999 ed.), pg. 72.

Maida Heatter states that she once received a marriage proposal over this cake and I am not surprised. It is wonderful and reminiscent of what you would find in a bakery. This is one of the recipes that I have long wanted to try and am just now getting around to it. It is simple to make and the batter is lovely (silky smooth). 

As is often the case with me, despite going over the recipe beforehand and checking my ingredients, I somehow overlooked the fact that I only had 1 stick of butter. Since I needed 1/2 stick more, I substituted canola oil. If you decide to use oil instead of butter in any recipe, know that the equilvalent will not be the same - you will not need as much oil. The general rule is to use 4 tablespoons of vegetable oil for every 1/4 cup butter. Some sources I read say that this is not recommended for cakes but it turned out fine. Of course, the obvious thing to do is to make sure you have the correct ingredients on hand!

Nut Filling

3/4 cup firmly packed brown sugar
1 TBS. cinnamon
1 TBS. unsweetened cocoa
2 to 3 TBS. currants or raisins, coarsly chopped
1 cup walnuts, finely chopped 


To make the filling, just place all of the ingredients in a bowl and mix. I used raisins and did not chop them (I suppose currants would be larger and would require chopping).

Cake Batter

3 cups sifted all-purpose flour
1 1/2 tsp. baking powder
1 1/2 tsp. baking soda
1/2 tsp. salt
6 oz. (1 1/2 sticks butter)
2 tsp. vanilla extract
1 1/2 cups sugar
3 eggs
2 cups sour cream

Preheat the oven to 375 and butter a Bundt pan (I was short on butter and used shortening instead).


Sift together the flour, baking powder, baking soda and salt.
Beat the butter to soften and add the vanilla and sugar. Beat for a minute or two.
Add the eggs, one at a time, and mix well. Beat on high speed for one minute.
Alternate adding the flour mixture with...
the sour cream.
There will be a lot of batter - notice how smooth it is.
Now it is time to assemble the cake. Add dollops of the batter to the greased pan and spread in an even layer. This should be a thin layer.
Sprinkle about 1/3 of the nut mixture over the battle. Now repeat with another layer of batter, etc. You will spread 4 layers of the batter and 3 of the nut mixture, ending with the batter layer. Bake for about 45 minutes (check with a toothpick). The book states to bake this for an hour but if I done that, I would have ended up with a burned cake. Keep an eye on it! When it is done, allow it is sit in the pan for 5 minutes. Prepare the glaze while it sits.


Glaze

2 cups confectioners sugar
1 tsp. vanilla extract
2 to 5 TBS. hot milk 


Mix the confectioners sugar, vanilla and hot milk together, gradually adding more milk as needed for a fairly thick consistency.
After sitting in the pan for 5 minutes, turn it upside down to remove the cake. Place it on a wire rack with parchment paper or foil underneath.
Slowly pour the glaze over the cake and allow it to run down the sides.
You can scoop up the glaze that falls underneath and pour it back over the cake if needed. Allow the glaze to set before serving. The cake is good served warm or cold.

Thursday, September 4, 2014

Chocolate and Peanut-Butter Ripples


Chocolate and Peanut-Butter Ripples
Source: Maida Heatter's Brand-New Book of Great Cookies (Random House, 1995 ed.), pg. 47.

These cookies taste like chocolate peanut butter cookies. I thought that the ripple effect might be more pronounced but they are not and they appear mostly at the edges of the cookie. They are still quite yummy, easy to make but somewhat time consuming. The cookies appear soft but they become crisper as they cool. They are fragile and do not travel well.

Chocolate Dough

2 oz. unsweetened chocolate
4 oz. (1 stick) unsalted butter
1 tsp. vanilla extract
1/4 tsp. salt
3/4 cup granulated sugar
1 egg
1 cup sifted all-purpose flour

Preheat the oven to 325 and line several cookie sheets with parchment paper.

Melt the chocolate in the top of a double boiler and set aside.

Cream the butter and add the vanilla, salt and sugar and beat well.

Add the melted chocolate.

Add the egg.
On low speed, add the flour and beat until smooth.


Peanut-Butter Dough

2 TBS. unsalted butter
1/4 cup smooth peanut butter
1/2 cup light brown sugar
2 TBS. sifted all-purpose flour 

The peanut-butter dough can be mixed in a small bowl with an electric mixer. Mix the peanut butter with the butter.

 
Add the brown sugar and the flour.


Shaping the Cookies

Divide the chocolate dough in half.

Drop one half of the chocolate dough by teaspoons about 2 inches apart
onto the parchment paper lined cookie sheets.
Top each mound with a teaspoon-sized portion of the peanut-butter dough.


Now top again with the chocolate dough mixture that you set aside.

Flatten slightly with a fork.

Bake for about 15 minutes, reversing your pans about half-way through. Let them cool on the sheets for a minute or so until they are firm enough to transfer to a rack.