Wednesday, February 8, 2012

Chocolate Chip Wheat Germ Cookies

Chocolate Chip Wheat Germ Cookies
Source: Maida Heatter's Book of Great Chocolate Desserts (Andrews & McMeel Publishing, 2006 ed.), pg. 115.

These cookies were a pleasant surprise and I absolutely love them. They are crisp and chewy and I like them even better than the Positively-The-Absolute-Best Chocolate Chip Cookies. They are very large and flat (you measure them out with a 1/4 measuring cup and I'm not exactly sure if they have to made this large. Maida Heatter credits Esther Starbuck, a high-school teacher from Buena Vista, Colorado for this recipe.

3/4 cup unsifted all-purpose flour 
1 tsp baking powder
1/2 tsp salt
1/4 lb (1 stick) sweet butter (softened)
3/4 tsp vanilla extract
1/2 cup sugar
1/3 cup dark brown sugar, firmly packed
1 large egg
1/4 cup quick-cooking oats (not instant) oatmeal
3/4 cup untoasted wheat germ
2/3 cup shredded coconut
1 cup semisweet chocolate morsels


Adjust two racks to divide the oven into thirds and preheat to 350 degrees. Line cookie sheets with foil and set aside.


Stir together the flour, baking powder and salt and set aside.


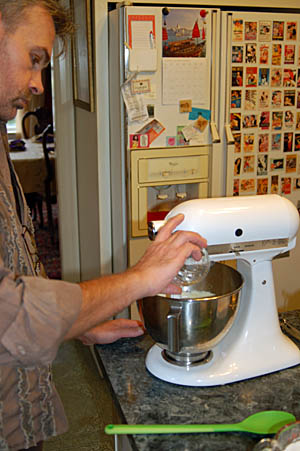
Cream the butter in the bowl of an electric mixer. Beat in the vanilla and two sugars. Add the egg and beat well. On low speed add the sifted dry ingredients, scraping the bowl and beating only until mixed. Mix in the oatmeal, wheat germ and coconut. Stir in the morsels.


Spread out a piece of wax paper. Use a 1/4 cup measuring cup to measure out the dough for each cookie. Form mounds (this will make about 9 or 10) on the wax paper.
Wet your hands with cold water and roll a mound of dough into a large ball for each cookie. Place about 5 inches apart on the foil-lined cookie sheets. 


Press the dough balls with the tines of a fork in all directions to flatten them to 1/2 inch thickness. (If the dough cracks around the edges, press them back together).


Bake two sheets at a time for 12 - 20 minutes (depending on your oven), reversing the sheets from top to bottom and front to back midway through baking. When they are done, the cookies will be lightly colored and the tops will spring back when lightly pressed. Do not under bake - make sure they are crisp on the edges and bottom when cool. The cookies will spread out 4-5 inches when done. (If baking only one sheet at a time, use the upper rack).


Let cool on the foil briefly before transferring to a cooling rack with a metal spatula. When cool, store airtight.


Saturday, February 4, 2012

Rocky Roads

Rocky Roads 
Source: Maida Heatter's Book of Great Chocolate Desserts (Andrews & McMeel Publishing, 2006 ed.), pg. 250.

This is probably the easiest Maida Heatter recipe you will find. Only three ingredients, no baking and you can make it in 10 minutes. It is very pretty and you could wrap the entire block of candy and give it as a gift.


1 pound milk chocolate (I used Hershey's)
12 large marshmallows or 1 2/3 cup miniature marshmallows 
1 1/2 cups pecan halves or large pieces


Line the bottom and sides of an 8 inch square cake pan with foil. If using large marshmallow into quarters. (Use miniature marshmallows to save time and skip this step).

Break the chocolate into pieces and slowly melt it on low heat in a double boiler.

Pour about half of the chocolate mixture into the foil lined pan and spread it to cover the bottom.

Sprinkle half of the nuts over the chocolate.

Place the marshmallows pieces in an even layer over the chocolate and nuts.

Drizzle the remaining chocolate over the top. It will not cover the top but should be drizzled so that it holds the nuts and marshmallows in place.  Top with the remaining nuts.

Place the pan in the refrigerator and chill until firm. Remove from the pan, peel off the foil and cut into 16 to 24 squares. They can be wrapped individually in wax paper or cellophane or wrap the entire block in foil until serving. Store in the refrigerator to keep the chocolate fresh looking. It will keep for weeks.


Yum

Monday, January 30, 2012

Boston Cream Pie

Boston Cream Pie
Source: Maida Heatter's Cakes (Andrews & McMeel Publishing, 2011 ed.), pg. 95.

My birthday was last week and Michael always makes me my favorite cake, the Boston Cream Pie. He doesn't do a lot of baking although he is an excellent cook. He usually uses a box mix but this year he asked me if Maida Heatter had a recipe. Of course she did! I helped him and we made the cake in installments, first baking the cake and freezing it. The filling was made a few days before my birthday and refrigerated. Then, on the last day, the cake was assembled and the frosting made. I have had many Boston Cream Pies and I can easily say that this was the best one ever! The filling was outstanding and Michael thinks it would make an excellent filling for a coconut cream pie. No one (including Ms. Heatter) seems to know why this is called a "pie" instead of a "cake" but regardless of the name, it is a sinfully delicious dessert.


Vanilla Pastry Cream
 
If you make the cake in one day, make this vanilla pastry cream first so that it can be chilled. Otherwise, you can make this ahead of time and refrigerate it.

2 eggs
1/4 cup plus 1 TBS sifted all-purpose flour
1/4 tsp salt
2/3 cup granulated sugar
2 cups milk
1 tsp vanilla extract
1/4 tsp almond extract
1 oz. (1/4 stick) unsalted butter, cut into small pieces

Beat the eggs lightly and set aside. Mix the flour, salt and sugar in a heavy 1-quart saucepan. Gradually stir in the milk, then cook, stirring constantly, over medium-low heat until the mixture comes to a boil and starts to thicken. Continue to stir and boil gently for a minute or two. The mixture will be thick - similar to vichyssoise.

Remove pan from the heat and ladle about 1/2 cup of the hot mixture to the eggs and stir well to mix. (Do this slowly and stir to avoid cooking the eggs). Repeat, adding 1/2 cup at a time until you have added about half of the mixture to the eggs. Slowly , stirring constantly, stir the egg mixture into the remaining hot milk mixture.

Place the pan over low heat and cook, still stirring constantly, for about 2 minutes. Remove from the heat and mix in the butter and the almond and vanilla extracts.

Stop the cooking by pouring the mixture into a bowl. Cut a round of wax paper to fit on top of the cream, touching it. This prevents a skin from forming.

Let this stand and cool and then refrigerate for at least an hour. You can make it a day or so ahead of time and keep it refrigerated until needed.


Sponge Cake

1 cup sifted all-purpose flour
1 tsp baking powder
3 eggs, separated
1/4 tsp salt
2/3 cup sugar
1 tsp vanilla extract
1 TBS lemon juice
2 TBS cold water
3 TBS unsalted butter, melted

Adjust rack to center of the oven and preheat to 350. Butter a 9 x 1 1/2 inch round cake pan, line the bottom with parchment or wax paper, butter the paper and dust with fine dry bread crumbs.

Sift together the flour and baking powder. Set aside.


Beat the egg whites and salt with an electric mixer until the whites hold a soft shape. Reduce the speed to medium and slowly add 1/3 cup of the sugar (reserve the remaining 1/3 cup). Increase the speed and beat briefly until the whites hold a point when the beaters are raised. Do not let the whites become stiff or dry.


Transfer the whites to a large mixer bowl. Set aside.

Place yolks in the small bowl of the mixer. Beat briefly, then gradually add the remaining 1/3 cup of sugar. Beat at high speed until the mixture is very light - almost white. Beat in the vanilla and lemon juice. Lower the speed and add the cold water, scraping the bowl as necessary and beating only until the mixture is smooth.

Fold the yolk into the whites in four additions (do not handle more than necessary).


Place the dry ingredients in a sifter and hold the sifter over the bowl, sifting with one hand and folding with the other. Add the dry ingredients in four or five additions. (do not handle more than necessary).


Add the melted butter to the batter and fold gently until barely incorporated. Turn the batter into the prepared pan and smooth the top.


Bake for 15-25 minutes, until the top springs back when pressed gently with a fingertip.

Remove from oven. Use a sharp knife to cut around the rim of the pan to release the cake. Let stand in the pan for 5 minutes before turning the cake out onto a cooling rack.

The cake must be cut into two layers but this is easier to do if chilling or freezing the cake first.

When ready to cut, use of long thin sharp knife (or cake cutting tool) to cut the cake into 2 thin layers. Spread the chilled pastry cream over the first layer to 1/2 inch from the edges of the cake. Cover with the top layer. Refrigerate the cake while you make the glaze.


Chocolate Glaze

1/4 cup whipping cream
4 oz. semisweet chocolate, chopped coarse

Place the cream in a small heavy saucepan over medium heat until it begins to bubble. Add the chocolate, stir briefly until partly melted, remove the pan from the heat and continue to stir until completely melted. Transfer the glaze to a small bowl and let it stand for 10 minutes, stirring occasionally.

Pour the glaze onto the cake; then, with a long, narrow metal spatula, smooth it just to the edges of the cake. Try to avoid letting the glaze run down the sides of the cake but it is okay if it does. Refrigerate and serve cold.


Monday, January 23, 2012

Chocolate Peanut Butter Cookies

Chocolate Peanut Butter Cookies
Source: Maida Heatter's Cookies (Andrews & McMeel Publishing, 2011 ed.), pg. 28.

I'm sure my love of chocolate comes from my mother, who loves it as much as I do. I always try and take a dessert to her house  every week when I visit. Over the weekend, I whipped up these cookies. They are easy to make and delicious. They are just like plain peanut butter cookies but with a hint of chocolate.

They burn easily on the bottom so be sure and start checking them about 10 minutes after they go in the oven.


  • 2 ounces unsweetened chocolate
  •  1 ounce semisweet chocolate
  • 1 1/2 cups sifted all-purpose flour
  •  3/4 teaspoon baking soda
  • 1/2 teaspoon salt
  • 1 stick (4 ounces) unsalted butter, softened 
  • 1/2 teaspoon vanilla extract
  • 1/2 cup packed dark or light brown sugar
  • 1/2 cup granulated sugar
  • 1/2 cup smooth peanut butter
  •  1 egg
Bake these cookies one sheet at a time so some won't burn before others are done. Line cookie sheets with parchment paper and position the oven rack in the middle of the oven. Preheat to 375.


Place both chocolates together in a small double boiler over simmering water (low heat) to melt the chocolate.

Sift together the flour, baking soda and salt. Set aside.

Place the butter in the small bowl of an electric mixer and beat until soft. Add the vanilla and both sugars and mix well. Mix in the peanut butter.
Add the melted chocolate and mix. Beat in the egg.
Add the sifted dry ingredients, mixing on low speed until incorporated.
Turn the mixture out onto a piece of foil or wax paper. Shape it into an oblong log. Slice it into 48 pieces.


Take the pieces and roll them into balls. Place them 2 inches apart on the parchment paper.
Use a fork to gently flatten the cookies.


Bake one sheet at a time, about 10-15 minutes, reversing the sheet front to back about half-way through. Press lightly with your fingertip - the cookies should be dry and semi-firm when done. They will become crisp after they cool. Transfer to a cooling rack with a metal spatula.


Saturday, January 21, 2012

The Orient Express Chocolate Torte

The Orient Express Chocolate Torte
Source: Maida Heatter's Book of Great Chocolate Desserts (Andrews & McMeel Publishing, 2006 ed.), pg. 37.

This is a small, dense, flourless cake (only 5 ingredients in the cake!) that is a bit unusual. The cake is very nutty as it is mostly composed of ground almonds. The chocolate buttercream icing is divine.

I had a few problems with this cake. I made the cake first and kept in the freezer over a week before I made the frosting and assembled it. The cake itself is very, very thin and quite fragile. At first I thought I had used too large of a pan but I went back and checked and my springform pan was 9 x 3 so it was correct. After the cake has baked, it is sliced into 2 pieces. It is best to freeze it first before cutting. Still, even after freezing, the cake was trying to come apart. The recipe says that the cake is fragile and she is not kidding!


I also had issues with the frosting. Maida says to beat the frosting quite a bit and then place it in the freezer or refrigerator to firm it up and then remove it and beat it again. I found that the icing was perfect after the first beating but putting it in the freezer for a few minutes really screwed up both the texture and the glossiness. If I make this again, I think I will skip the freezer part and the frosting will be just fine. I also found that there was not enough frosting to cover the entire cake and I ended up leaving the sides bare. 


So, be warmed, this is a somewhat challenging cake!

For the cake:

3 oz. unsweetened chocolate
7 ½ oz. (1 ½ cups) unblanched almonds
5 eggs, separated
2 egg yolks
¾ cup granulated sugar
Pinch of salt

Place the oven rack 1/3 of the way up from the bottom. Preheat the oven to 300. Butter a 9 x 3 inch springform pan or cake pan, line the bottom with buttered wax paper and dust with fine breadcrumbs.

Coarsely chop the chocolate and place it in a food processor or nut grinder. Add the almonds and pulse until they are finely ground. 
Pour the 7 egg yolks in the bowl of an electric mixer. Add the sugar and beat until yolks are lemon-colored but not thick.


Add the ground chocolate and almond mixture and mix. 

In a clean and dry mixer bowl, pour the 5 egg whites and the salt. Beat until they hold shape, but not until they are stiff or dry. Fold the egg whites into the chocolate mixture.


Pour the batter into the prepared pan. Bake for 45 - 65 minutes, or until the top just springs back when pressed with the fingers. Remove from the oven and run a sharp knife around the outer edge of the cake. Allow the cake to cool in the pan for 15 minutes before removing it. Let the cake cool completely. It can be frozen for later assembly. 


Buttercream Frosting:


3 oz. (3/4 stick) sweet butter
½ teaspoon pure vanilla extract
½ cup granulated sugar
2 large eggs
3 oz. unsweetened chocolate

Cream the butter and vanilla in a small mixer bowl. Add the sugar and mix about 3-4 minutes. Add the eggs, one at a time, beating on high for a few minutes after each one is added.

Place the chocolate in the top of a double broiler placed over low heat and slowly melt the chocolate.

Add the melted chocolate to the butter mixture, beating until well blended. Place the mixture in the freezer or refrigerator until it is quite firm. Remove the buttercream from the freezer or refrigerator and beat until it is soft, smooth, and spreadable. (**See my notes about this above)

Remove the cake from the freezer and slice it into two pieces. Spread 1/3 of the buttercream on top of the bottom layer of cake. Place the second layer of cake on top of this, cut side down. Spread the remaining buttercream over the cake top and sides.