Thursday, April 19, 2012

Joan's Frozen Lemon Mousse

Joan's Frozen Lemon Mousse
Source: Maida Heatter's Pies & Tarts (Andrews & McMeel Publishing, 1997), pg. 246 and Maida Heatter's New Book of Great Desserts (Knopf, 1982), pg. 447.

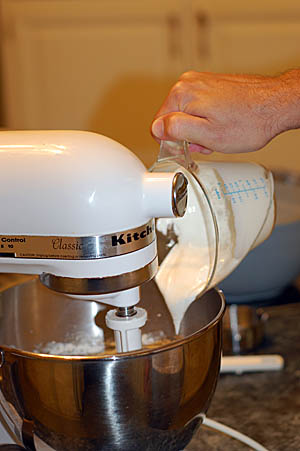
This delicious dessert is easy but it helps to have everything you need ready in advance. You will need your mixer bowl 3 separate times. The bowls and beaters should be chilled for whipping the heavy cream and I usually chill my bowl for the egg whites as well. The recipe calls for the crust to be pressed up the sides of the pan which, as you can see in the photos, I forgot to do. This caused the base of the crust to be very thick. 

One of Michael's all-time favorite desserts is a simple frozen pie made with frozen lemonade mixed with whipped cream in a graham cracker crust. This dessert reminded me of that one but perhaps not as tart. You will need to make it a day ahead or you can make it up to 2 weeks in advance.

(In case you are wondering who Joan is, she is Joan Borinstein, a friend of M.H.)

Crust
1 12 oz. box vanilla wafers
1/2 cup (1 stick) unsalted butter, melted

Butter the sides only of an 8 x 3 inch springform pan. 


Place vanilla wafers in the bowl of a food processor fitted with a metal blade
Pulse the wafers into fine crumbs. Melt the butter and add it to the crumbs; mix thoroughly until completely blended
Use about 1/4 of the mixture at a time and press firmly on the bottom and sides of the pan. (I did not do this correctly, see my intro notes above)
Filling

4 eggs, separated
1 cup sugar
1/2 cup fresh lemon juice (grate the rinds before squeezing)
Finely grated rind of 3 or 4 lemons
Pinch of salt
1 1/2 cups heavy cream

Beat the egg yolks until they are pale.
Add 1/4 cup of the sugar (reserving the remaining 3/4 cup). Beat at high speed for a minute or two.
On low speed, gradually add the lemon juice, scraping the bowl and beating only until smooth.

Stir in the grated lemon rind
In a clean bowl with clean beaters, beat the egg whites with the salt until they hold a soft shape.Reduce the speed to moderate and gradually add the reserved 3/4 cup of sugar, adding only 1 or 2 tablespoons at a time. Increase the speed to high again and continue to beat until the whites and sugar become thick and marshmallow-like. Do not beat until stiff. Set aside.


In a chilled bowl with chilled beaters, whip the heavy cream until it holds a firm shape but not until it is stiff. (It helps to have lots of mixing bowls to make this!)
In several small additions fold the yolks into the whites. Then, in several additions, fold the yolks and whites into the whipped cream.
Pour into the crumb-lined pan.
Smooth the top. Freeze for a few hours until firm. Then cover airtight with plastic wrap or aluminum foil. Freeze overnight or up to 2 weeks.


Wednesday, April 18, 2012

Devilish Cake


Devilish Cake
Source: Maida Heatter's Book of Great Chocolate Desserts (Andrews & McMeel Publishing, 2006 ed.), pg. 69.

Ah, Devils Food Cake! I love it. In appearance, the cake is so thin that it reminded me of a torte. I suppose if you'd like thicker layers, you could use 8" pans but the recipe calls for 9" so that is what I used.  The cake is dense in texture and the icing is delicious. For me, this doesn't beat the Country Fair cake but it comes close!

1/2 cup unsweetened cocoa powder (Dutch process)
3/4 cup boiling water
1 stick unsalted butter
1 tsp vanilla extract
1/2 tsp salt
1 1/2 cups sugar
2 eggs
1 tsp baking soda
1 cup sour cream 
2 cups sifted all-purpose flour 


Adjust rack to center of oven and preheat to 350 degrees. Butter two 9-inch round layer cake pans. Dust them with flour and tap out excess and set aside.


In a bowl, mix the cocoa and boiling water until smooth. Set aside
In a large bowl of an electric mixer, cream the butter for 3 minutes. Add vanilla, salt, sugar and beat well. Add eggs one at a time, beating well after each addition.
In another small bowl, stir the baking soda into the sour cream.
On low speed add the flour to the butter mixture in three additions alternating with the sour cream in two additions, scraping the bowl with a rubber spatula and beating only until smooth after each addition.
Add the cocoa and beat until smooth.
Pour the batter into the prepared pans, tap them slightly to get the air bubbles out and rotate slightly to level the tops.
Bake for 20-30 minutes or until the layers barely begin to come away from the sides of the pan (this only took 20 minutes in my oven).  Cool in the pans for 15 minutes. Cover each layer with a rack and invert, remove pans, cover with another rack and invert again, leaving the layers right side up on the racks to cool. Place four strips of wax paper around the outer edges of a cake plate. Place one layer upside down on the plate. You are now ready to ice the cake.

CHOCOLATE ICING
4 ounces (squares) unsweetened chocolate
2 TBS butter
1/2 cup minus 1 TBS milk
1 cup sifted confectioners sugar
1 egg
1 tsp vanilla extract
pinch of salt

Place chocolate in a double broiler over hot water on moderate heat. Add the butter, milk, and sugar, and stir until the butter is melted. Cook, stirring for 3 minutes.

Beat the egg in a small bowl only to mix. Very gradually stir a few spoonfuls at a time of the hot chocolate mixture into the egg. Stir constantly until you have added about one-third of the chocolate. Then stir the egg into the remaining hot chocolate. Add the vanilla and salt.


Transfer the mixture to a small bowl that will sit in a larger bowl filled halfway with ice and water.  Beat at high speed, scraping the bowl constantly with a rubber spatula for 1-2 minutes until mixture thickens slightly, do not let it harden.

Pour about one-third of the icing over the bottom layer and spread it smoothly. It will be a very thin layer.

Cover with the second layer of cake, placing it right side up so that both bottoms will meet in the center. Pour the remaining icing over the top, spreading it over the top and sides.


Remove the wax paper strips but slowly pulling each one toward a narrow end.