Tuesday, May 8, 2012

Chocolate Coconut Macaroons

Chocolate Coconut Macaroons
Source: Maida Heatter's Book of Great Chocolate Desserts (Andrews & McMeel Publishing, 2006 ed.), pg. 136.

Soft, chewy and delicious! I liked these macaroons better than the Bittersweet Chocolate Macaroons that I made previously. For me, macaroons are supposed to have coconut in them! These are addictive and won't stay around long. 

4 oz. semisweet chocolate
1 oz. unsweetened chocolate
2 egg whites, room temperature
Pinch of salt
1/2 cup sugar
1 tsp. vanilla extract
7 oz. (2 2/3 cups) shredded coconut 

Adjust two racks to divide the oven into thirds and preheat oven to 325 degrees. Line two 12 x 15 inch cookie sheets with aluminum foil.

Break up the chocolates and place them in the top of a double boiler over hot water on moderate heat. When the chocolate has melted, set aside and cool to room temperature.
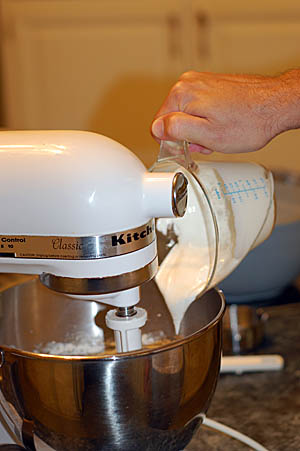
Beat the egg whites with the salt until they hold a firm peak when the beaters are raised.
On low speed add the sugar 1 to 2 tablespoons at a time, pausing 10 seconds between additions. Add the vanilla.
Increase the speed to high and beat for about 5 minutes more until the meringue is very stiff.
Reduce the speed to low and add the cooled chocolate, scraping the bowl with a rubber spatula and beating only until mixed.
Remove the bowl from the mixer and, with a rubber or wooden spatula, fold in the coconut.
Use a rounded teaspoon of the mixture for each cookie. Place the mounds 1 inch apart on the foil, forming 15 cookies on each sheet.
Bake for about 16 minutes, reversing the sheets top to bottom and front to back once to insure even baking. When the macaroons are done they should feel dry on the outside but must remain soft in the centers. Transfer to a rack to cool with a metal spatula. Raise the racks as high as you can (I used two stacked on top of the other) because they need plenty of room for air to circulate underneath, or steam forms on the bottom and keeps the bottoms of the cookies from being as dry as they should be.

They may be stored airtight or only loosely covered. If they feel too soft/moist when they have cooled, let them dry out by storing them so the air can get to them.

Variations:

Chocolate-Nut Coconut Macaroons: Use abot 1/2 to 3/4 cup pecans, cut into medium-size pieces, and fold them in along with the coconut.

Chocolate Coconut Macaroons with Chocolate Chips: Use about 3/4 cup semisweet chocolate morsels and fold them in along with the coconut.

Thursday, April 19, 2012

Joan's Frozen Lemon Mousse

Joan's Frozen Lemon Mousse
Source: Maida Heatter's Pies & Tarts (Andrews & McMeel Publishing, 1997), pg. 246 and Maida Heatter's New Book of Great Desserts (Knopf, 1982), pg. 447.

This delicious dessert is easy but it helps to have everything you need ready in advance. You will need your mixer bowl 3 separate times. The bowls and beaters should be chilled for whipping the heavy cream and I usually chill my bowl for the egg whites as well. The recipe calls for the crust to be pressed up the sides of the pan which, as you can see in the photos, I forgot to do. This caused the base of the crust to be very thick. 

One of Michael's all-time favorite desserts is a simple frozen pie made with frozen lemonade mixed with whipped cream in a graham cracker crust. This dessert reminded me of that one but perhaps not as tart. You will need to make it a day ahead or you can make it up to 2 weeks in advance.

(In case you are wondering who Joan is, she is Joan Borinstein, a friend of M.H.)

Crust
1 12 oz. box vanilla wafers
1/2 cup (1 stick) unsalted butter, melted

Butter the sides only of an 8 x 3 inch springform pan. 


Place vanilla wafers in the bowl of a food processor fitted with a metal blade
Pulse the wafers into fine crumbs. Melt the butter and add it to the crumbs; mix thoroughly until completely blended
Use about 1/4 of the mixture at a time and press firmly on the bottom and sides of the pan. (I did not do this correctly, see my intro notes above)
Filling

4 eggs, separated
1 cup sugar
1/2 cup fresh lemon juice (grate the rinds before squeezing)
Finely grated rind of 3 or 4 lemons
Pinch of salt
1 1/2 cups heavy cream

Beat the egg yolks until they are pale.
Add 1/4 cup of the sugar (reserving the remaining 3/4 cup). Beat at high speed for a minute or two.
On low speed, gradually add the lemon juice, scraping the bowl and beating only until smooth.

Stir in the grated lemon rind
In a clean bowl with clean beaters, beat the egg whites with the salt until they hold a soft shape.Reduce the speed to moderate and gradually add the reserved 3/4 cup of sugar, adding only 1 or 2 tablespoons at a time. Increase the speed to high again and continue to beat until the whites and sugar become thick and marshmallow-like. Do not beat until stiff. Set aside.


In a chilled bowl with chilled beaters, whip the heavy cream until it holds a firm shape but not until it is stiff. (It helps to have lots of mixing bowls to make this!)
In several small additions fold the yolks into the whites. Then, in several additions, fold the yolks and whites into the whipped cream.
Pour into the crumb-lined pan.
Smooth the top. Freeze for a few hours until firm. Then cover airtight with plastic wrap or aluminum foil. Freeze overnight or up to 2 weeks.


Wednesday, April 18, 2012

Devilish Cake


Devilish Cake
Source: Maida Heatter's Book of Great Chocolate Desserts (Andrews & McMeel Publishing, 2006 ed.), pg. 69.

Ah, Devils Food Cake! I love it. In appearance, the cake is so thin that it reminded me of a torte. I suppose if you'd like thicker layers, you could use 8" pans but the recipe calls for 9" so that is what I used.  The cake is dense in texture and the icing is delicious. For me, this doesn't beat the Country Fair cake but it comes close!

1/2 cup unsweetened cocoa powder (Dutch process)
3/4 cup boiling water
1 stick unsalted butter
1 tsp vanilla extract
1/2 tsp salt
1 1/2 cups sugar
2 eggs
1 tsp baking soda
1 cup sour cream 
2 cups sifted all-purpose flour 


Adjust rack to center of oven and preheat to 350 degrees. Butter two 9-inch round layer cake pans. Dust them with flour and tap out excess and set aside.


In a bowl, mix the cocoa and boiling water until smooth. Set aside
In a large bowl of an electric mixer, cream the butter for 3 minutes. Add vanilla, salt, sugar and beat well. Add eggs one at a time, beating well after each addition.
In another small bowl, stir the baking soda into the sour cream.
On low speed add the flour to the butter mixture in three additions alternating with the sour cream in two additions, scraping the bowl with a rubber spatula and beating only until smooth after each addition.
Add the cocoa and beat until smooth.
Pour the batter into the prepared pans, tap them slightly to get the air bubbles out and rotate slightly to level the tops.
Bake for 20-30 minutes or until the layers barely begin to come away from the sides of the pan (this only took 20 minutes in my oven).  Cool in the pans for 15 minutes. Cover each layer with a rack and invert, remove pans, cover with another rack and invert again, leaving the layers right side up on the racks to cool. Place four strips of wax paper around the outer edges of a cake plate. Place one layer upside down on the plate. You are now ready to ice the cake.

CHOCOLATE ICING
4 ounces (squares) unsweetened chocolate
2 TBS butter
1/2 cup minus 1 TBS milk
1 cup sifted confectioners sugar
1 egg
1 tsp vanilla extract
pinch of salt

Place chocolate in a double broiler over hot water on moderate heat. Add the butter, milk, and sugar, and stir until the butter is melted. Cook, stirring for 3 minutes.

Beat the egg in a small bowl only to mix. Very gradually stir a few spoonfuls at a time of the hot chocolate mixture into the egg. Stir constantly until you have added about one-third of the chocolate. Then stir the egg into the remaining hot chocolate. Add the vanilla and salt.


Transfer the mixture to a small bowl that will sit in a larger bowl filled halfway with ice and water.  Beat at high speed, scraping the bowl constantly with a rubber spatula for 1-2 minutes until mixture thickens slightly, do not let it harden.

Pour about one-third of the icing over the bottom layer and spread it smoothly. It will be a very thin layer.

Cover with the second layer of cake, placing it right side up so that both bottoms will meet in the center. Pour the remaining icing over the top, spreading it over the top and sides.


Remove the wax paper strips but slowly pulling each one toward a narrow end.

Wednesday, April 11, 2012

Dolly's Crisp Toffee Bars

Dolly's Crisp Toffee Bars
Source: Maida Heatter's Book of Great Chocolate Desserts (Andrews & McMeel Publishing, 2006 ed.), pg. 111.

These are wonderful and easy to make. They are crisp, crunchy and buttery. The chocolate chips and nuts give them a great texture. 

(Notes in red are my own)

1/2 pound (2 sticks) unsalted butter (softened)
1/2 tsp. salt
1 tsp. vanilla extract
1 cup light or dark brown sugar, firmly packed
2 cups sifted all-purpose flour
4 oz. walnuts (1 generous cup), cut into medium sized pieces
6 oz. (1 cup) semi-sweet chocolate chips 

Adjust rack to the center of the oven and preheat oven to 350 degrees.

Cream the butter in the bowl of an electric mixer. Add the salt, vanilla and sugar, beating well, until the mixture holds together. Add the flour.
Add the nuts...
Add the chocolate morsels...
Stir until the morsels and nuts are evenly distributed.
The dough will be stiff. Place teaspoon sized mounds of the dough close together on an ungreased 10 1/2 x 15 1/2 x 1 inch jelly roll pan (I use an ice-cream scoop for this).
With floured fingertips press the dough firmly to make an even layer. (I thought of an easier and less messy way to do this. Take a piece of plastic wrap and cover the dough, then press until it all comes together). You will have a thin layer. Bake for 20 -25 minutes, reversing the pan front to back once to insure even baking. The cake will be golden brown.
Let cool in the pan for a minute or two.
Use a small sharp knife to cut into bars. Let stand in the pan until cool. With a wide metal spatula transfer to paper towels to dry the bottoms. Wrap them individually in clear cellophane or wax paper or store them in an airtight container. (I was amazed at how neatly the cookies sliced - there were hardly any crumbs)

Sunday, April 1, 2012

Country Fair Chocolate Layer Cake

Country Fair  Chocolate Layer Cake
Source: Maida Heatter's Book of Great Chocolate Desserts (Andrews & McMeel Publishing, 2006 ed.), pg. 59.

I think this is the best chocolate cake I've ever made. It is outstanding. I made the cake layers a few weeks ago, planning to take this to a work function, but plans changed and I ended up freezing it. We had company this past weekend so I whipped up the icing and finished the cake. The icing is absolutely beautiful and spreads nicely. I was amazed how beautiful the cake was when I finished it. The cake is dense, rich and delicious. Everyone agreed, even those who are not particularly chocolate lovers, that this cake is a winner!


Cocoa Cake Layers

2 cups sifted cake flour
1 tsp baking soda
1/2 tsp salt
6 TBS strained unsweetened cocoa powder (preferably Dutch process)
1/4 lb (1 stick) sweet butter
1 tsp vanilla extract
1 1/4 cups sugar
2 large eggs
1 cup milk 

Adjust rack to center of the oven and preheat to 350 degrees. Butter two 8-inch round cake pans, dust them with flour, and set aside.

Sift together the flour, baking soda, salt and cocoa and set aside.

Cream the butter. Add the vanilla and then the sugar and beat well. Beat in the eggs one at a time, scraping the bowl with a rubber spatula and beating well after each addition.
On low speed, add the sifted dry ingredients alternating with the milk in two additions. Scrape the bowl with a rubber spatula after each addition.
Divide the batter between the prepared pans and smooth evenly.
Bake for 30 to 40 minutes until the layers just begin to come away from the sides of the pan. Cool the layers in the pans for 5-6 minutes. Cut around the sides of the pan with a small sharp knife. Carefully remove the cake layers from the pans and cool completely.
Prepare a flat cake plate or serving board by placing four strips of wax paper around the outer edges of the plate. Place one cooled cake layer upside down on the plate, checking to see that the papers touch the cake all around. (You can also use a cake-decorating turntable)


Chocolate Icing


5 oz. (5 squares) unsweetened chocolate, chopped into small pieces
1 cup heavy cream
1 1/4 cups sugar
1/4 lb (1 stick) sweet butter
1 tsp vanilla extract

In a heavy saucepan (about 3 qts. size), stir the cream and sugar together. Stir over moderate heat until the mixture comes to a boil. Then reduce the heat and let simmer for exactly 6 minutes.
Remove from the heat, add the chocolate, stir until it is melted, then add the butter and stir until it is melted. Add the vanilla and stir.

Partially fill a large bowl with ice water. Place the saucepan of icing in the bowl of water and stir frequently until the mixture is cool. Then stir constantly until it begins to thicken. Remove the pan from the water and stir briskly with a rubber or wooden spatula until it becomes smooth and thick enough to spread. (This should only take a few seconds or a minute). If the icing is too soft, return it to the ice water briefly, then remove and stir again.
When the icing is thick enough, quickly spread it about 1/3 thick over the cake layer on the plate. Place the second cake layer right side up on top of the other layer. Pour the remaining icing over the cake and spread.

Remove the wax paper strips by pulling each one toward a narrow end.