Friday, March 22, 2013

Mustard and Walnut Cheese Crackers


Mustard and Walnut Cheese Crackers
Source: Maida Heatter's Brand-New Book of Great Cookies (Random House, 1995 ed.), pg. 229.

These are like cheese straws except maybe better! They are very spicy and intensely flavored. (I used extra-sharp cheddar cheese.) They would be great for appetizers or a party food. (If making these for a large group, you might want to double the recipe). One recipe makes about 48 crackers.

4 oz. (1 stick) unsalted butter
1 cup sifted unbleached flour
1/2 tsp. baking powder
1/2 tsp. black or white pepper (finely ground)
1/2 tsp. dry mustard powder
1/4 tsp. ground cayenne
1/2 lb. sharp cheddar cheese 
1 TBS. prepared mustard 
1/4 tsp. Tabasco sauce
6 oz. (generous 1 1/2 cups) walnut halves, chopped
 

Cut the butter into 1/2 inch slices and let stand at room temperature (it needs to be room temp. when you use it)

Sift together the flour, baking powder, pepper, dry mustard and cayenne. Set aside.

Cut the cheddar cheese into medium-small pieces and place in a food processor.
Process for about 20 seconds.
Add the sifted dry ingredients and pulse 7 or 8 times.

Add the butter...
and the prepared mustard.

Add the Tabsco sauce through the feed tube. Mix the ingredients.
Transfer the mixture to a bowl. It will be thick and sticky.
Add the walnuts and stir them into the batter.

Flour a work surface, transfer the dough by spoonfuls and line it up to form a roll about 12 inches long and 1 1/2 - 2 inches in diameter. Roll the dough until smooth.
Remove excess flour with a pastry brush.

Wrap in plastic wrap and refrigerate several hours or overnight (or longer).
   Baking:

 Preheat oven to 350. 

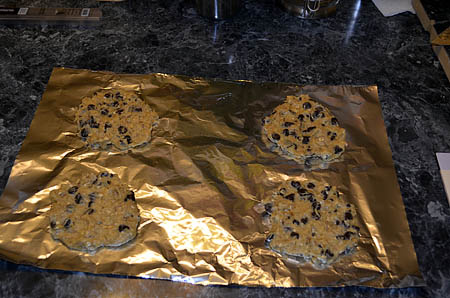
Use a sharp knife and slice 1/4 inch wide and place them 1 - 1 1/2 inches apart on an unlined and unbuttered cookie sheet. Bake for 12-15 minutes until the crackers are lightly colored. (Some crackers may be done before others - if so, remove those and return the others to the oven). After removing from the oven, place on paper towels or paper bags.

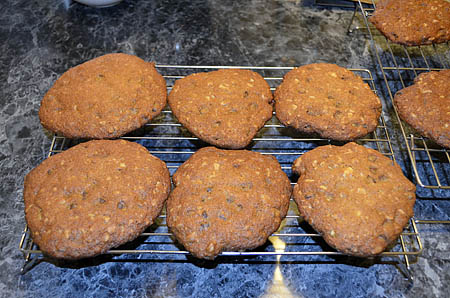
After cooling on paper towels, they can be transferred to a cooling rack to cool completely.
Store in an airtight container.
 

Friday, March 1, 2013

Big Sur Chocolate Chip Cookies


Big Sur Chocolate Chip Cookies
Source: Maida Heatter's Cookies (Andrews & McMeel Publishing, 1997 ed.), pg. 221 (page 230 of 2011 edition).

You've seen those huge cookies that you can get in specialty stores or at fairs and festivals. Well, why not make your own? These cookies are about 6 inches in diameter. You could eat half and save the rest for later or share with a friend. However, these are so good that it might be hard to eat just half.

1 1/2 cups sifted all-purpose flour
1/2 tsp. salt
1 tsp. baking soda
1/2 tsp. cinnamon
6 oz. (1 1/2 sticks) unsalted butter (softened)
1 1/2 tsp. vanilla extract
1 tsp. lemon juice
2/3 cup light brown sugar, firmly packed
1/3 cup sugar
2 eggs
1/4 cup quick-cooking (not instant) rolled oats
6 oz. (1 1/2 cups) walnuts, cut or broken into medium-sized pieces
6 oz. (1 cup) semisweet chocolate morsels

Makes 12-15 large cookies

Preheat oven to 350. Line cookie sheets with parchment or foil.

Sift together the flour, salt, baking soda and cinnamon. Set aside.
Cream the butter.
Add the vanilla.
Add the lemon juice.
Add the brown sugar.
Add the white sugar. Mix well.
Beat in the eggs, one at a time.
Add the sifted dry ingredients.
Add the oats. Beat only until mixed.
Remove the bowl from the mixer and add the nuts.
Add the chocolate chips. Stir.
Use a 1/4 measuring cup to scoop out dough for each cookie.
Place the mounds on the lined cookie sheets with several inches between them.
Wet your hands and smooth each mound into a ball.
Now flatten the balls into 1/2 inch thickness.
Bake for 12-18 minutes, until the cookies are well colored (they must not be too pale). Watch them carefully and remove from the oven before they are too dark. Let them stand for a minute until they are firm and can be transferred to a cooling rack.
Cooling racks need to be raised at least 1/2 inch from the work suface to allow air to circulate underneath. When cool, wrap them, two together (bottoms together) in plastic wrap or wax paper. They can be frozen.
     

Friday, February 22, 2013

Yogurt Cake


Yogurt Cake
Source: Maida Heatter's Book of Great Desserts (Andrews & McMeel Publishing, 1999 ed.), pg. 117.

A simple and delicately flavored pound cake that would be great with ice cream or fruit. I served it with Mandarin oranges. The Grand Marnier adds a wonderful touch but an orange glaze would also work well.

If you are using a stand mixer and have two bowls, it will save you some time. The egg whites can be mixed in the second bowl (store it in the freezer to chill the bowl and the whisk while you mix the cake ingredients). If you have only one mixer bowl, you will have to clean it and transfer the cake batter before mixing the egg whites. (The cake can also be made with a hand-held mixer). 

3 cups sifted all-purpose flour
2 tsp. baking powder
1/4 tsp. salt
1/2 lb. (2 sticks) butter, softened
2 cups sugar
5 eggs, separated
1 cup unflavored yogurt
Finely grated rind of 2 large, deep-colored oranges

Preheat oven to 375. Butter (or spray) a 9 x 3 1/2 inch tube pan. Line the bottom with paper cut to fit. Butter or spray the paper and dust with bread crumbs.  


Sift together the flour, baking powder and salt. Set aside.
Beat the butter slightly.

Reserve 1/4 cup of the sugar and set aside. Gradually add the remaining 1 3/4 cups to the bowl. Beat at medium speed for about 8-10 minutes until the mixture is almost liquid.

Add the egg yolks one at a time, beating well.
Add the yogurt.
Beat well, scraping the bowl to make sure all is mixed well.
On the lowest speed, gradually add the flour mixture.
Remove the bowl from the mixer and stir in the orange rind.
In a clean bowl, beat the egg whites until they hold a soft shape. (A chilled bowl and whisk make the job easier. I always use a whisk attachment when beating egg whites. Start the speed on low for the first 10-20 seconds before increasing the speed to high).


Add the reserved 1/4 cup sugar and continue to beat the egg whites until they are stiff but not dry.


Fold the egg whites into the batter in two separate additions.

Transfer the batter into the prepared pan.

Rotate the pan briskly to level the top of the batter.

Bake for 55 -70 minutes until a cake tester comes out clean. (Check the cake to make sure it is not browing too much on top - if it is, loosely cover it with foil for the last 15 minutes of baking time.) Cool in the pan on a rack for about 15 minutes, then carefully invert the pan to remove the cake. Let the cake cool completely. (If using Grand Marnier, sprinkle the cake with a few tablespoons as soon as the cake comes out of the oven).

Monday, February 4, 2013

Chocolate Oatmeal Brownies


Chocolate Oatmeal Brownies
Source: Maida Heatter's Book of Great Chocolate Desserts (Andrews & McMeel Publishing, 2006 ed.), pg. 154.

My last post was Chocolate Oatmeal Cookies and now we have the brownies. Yum! Yum! Unlike the cookies which were too crisp for me, these are soft (Maida compares them to macaroons). They are great heated in the microwave for about 8 seconds and then topped with ice cream. I found myself eating about 6 in a row after I had made them. Until spring comes and I can get outside, I may have to seek out a diet plan.

They are very easy, all done in a saucepan.

3 oz. (3 squares) unsweetened chocolate
1/4 lb. (1 stick) sweet butter
1/2 tsp. salt
3/4 cup dark or light brown sugar, firmly packed
1/3 cup honey
1 tsp. vanilla extract
1 egg, lightly beaten
2 2/3 cups quick-cooking (not "instant") rolled oats
4 oz. (generous 1 cup) walnut halves or large pieces

Adjust rack to center of oven and preheat to 425 degrees. Butter or spray the bottom and sides of a 9-inch square pan (I actually used an 8-inch pan) with aluminum foil.     

Melt the chocolate and butter in a heavy 2-3 qt. saucepan over low heat. Stir occasionally until melted.

Now mix in all of the other ingredients in the order listed in the recipe: salt, sugar, honey, vanilla, egg, oats and nuts.


The mixture will be very thick.


Pack the mixture firmly into the prepared pan.
Bake for 15 minutes. Cool in the pan on a rack for 15-20 minutes. Cover with another rack and invert and carefully remove the foil. (Note: The mixture tried to crumble apart on me so be very careful. If it does try to come apart, it can easily be pushed back into place with your fingers). Cool completely or chill in the freezer or refrigerator before slicing into bars.