
Hungarian Seven-Layer Cake (Source: Maida Heatter's Book of Great Chocolate Desserts (Andrews & McMeel Publishing, 2006 ed.), pg. 73.
This recipe caused me to use bad language. In the end though, it turned out nice and tasted great. I made this for a friend's birthday yesterday. My major gripe is that the recipe doesn't make enough batter or icing (a major pet peeve!).
First of all, seven 8" pans are needed. If you have that many, more power to you, and it will make life easier. I have four which wasn't too bad - I just had to clean them after the first go-around.
Now, the cake layers are very thin and she instructs that you use only 1 cup of batter per pan. Have you ever tried to use 1 cup of batter for a cake layer? It is not easy as the batter must touch the sides of the pan. Mine turned out haphazardly at best and the sizes ended up all over the place. Thankfully, the cake is covered with icing to hide your errors.
I made the cake layers a day ahead and I'm glad I did, especially after the icing debacle. I would have been in the kitchen all day had I not. The icing isn't really that difficult to make. The technique was different from any I'd made in the past. It is a beautiful dark icing but when I ended up short (and I only put a scant amount between the layers per her instructions), I wasn't a happy camper. I made a half batch to finish.
I was sure the cake was going to be a disaster so I made brownies to compensate. However, the cake was loved by all, even me. It is delicious with coffee and ice cream.
It is a recipe that taught me a number of things and made me aware of what to expect - IF I ever attempt this again!

Cake Layers
6 eggs, separated
3/4 cup sugar
1 cup sifted all-purpose flour
1/4 tsp. salt
Line seven 8" cake pans (or you may use a few at a time if you don't have seven) with wax paper. Butter the paper and the sides of the pans.
 |
| This is how I do it - use a marker to trace around the pan. |
 |
| Fold the paper into fourths. |
 |
| Cut along the lines. |
 |
| Unfold |
Beat the egg yolks and about half of the sugar for 5 minutes until pale and thick. Lower the speed of the mixer and add the flour only until it is incorporated. The batter will be thick.

In a separate bowl (preferably one that is chilled), add the salt to the egg whites and beat until they hold a soft shape. Gradually add the remaining sugar on low speed, then increase the speed. Beat until the egg whites are firm.

Add 1/2 cup of the egg whites to the yolks and stir. Add additional 1/2 cup increments, leaving about 2 cups of the whites in the bowl. Now fold the yolks into the remaining whites.


Use about 1 cup of the batter for each pan, spreading the batter all the way to the edges of the pans. The layers will be thin.

Bake for about 12-15 minutes - if you have limited pans, it is okay for the batter to sit at room temperature while the others bake. (See notes above in the introduction)
Use a knife to cut around the perimeter of the pans and turn the cakes out onto a cotton or linen towel. After the layers are all done, allow them to cool completely and prepare the icing.


Bittersweet Chocolate Filling & Icing
(Note - This doesn't make a lot of icing so I would recommend making more (After making the first batch, I halved the ingredients for a second batch).
5 ounces unsweetened chocolate
1/4 cup water
1/2 cup granulated sugar
1 TBSP. dry instant coffee
4 egg yolks
1 stick sweet butter, cut into small pieces, at room temperature
 |
| Melt the chocolate in top of a double boiler. |
 |
| In a small saucepan, mix the water with the sugar and instant coffee. Place over medium heat and mix until the sugar has dissolved and the mixture comes to a boil. |
 |
| Beat the egg yolks at high speed until they are pale in color. |
 |
| Add the sugar and coffee mixture in a slow stream to the egg yolks. |
 |
| Add the melted chocolate until smooth. |
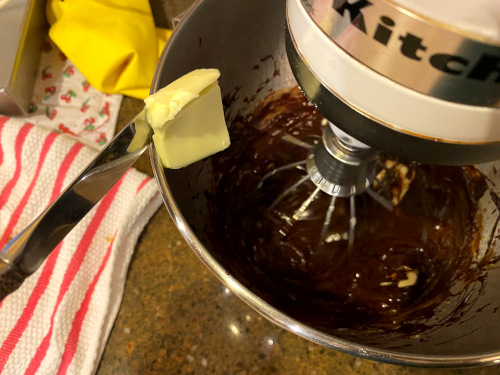 |
| Add the butter, a few tablespoons at a time, until the mixture is smooth. |
 |
| Spread a thin layer over the first cake layer and continue to assemble, adding the icing between each layer. Complete by icing the sides. Refrigerate until the icing has set (several hours). |

Comments