Showing posts with label cookies. Show all posts

Saturday, December 17, 2022

Chocolate Nut Icebox Cookies


Chocolate Nut Icebox Cookies 
(Source: Maida Heatter's Book of Great Chocolate Desserts (Andrews & McMeel Publishing, 2006 ed.), pg. 124.

Another icebox cookie, this one chocolaty and nutty. Like the previous cookie, these are thin, crisp and keep well in an airtight container. 

This recipe makes 75 to 100 cookies. Of course, you can keep the dough frozen and make as many as you want at a time and keep the unused dough in the freezer.  It will be good for months.

The dough should be frozen solid before slicing. I made these up and it was five days later before I baked some. 

1 1/2 cups sifted all-purpose flour
1/2 tsp. baking soda
1/2 tsp. salt
1/4 lb. (1 stick) sweet butter
1/2 tsp. vanilla extract
1 cup dark brown sugar, firmly packed
1 large egg
1/2 cup unsweetened cocoa powder (Dutch process)
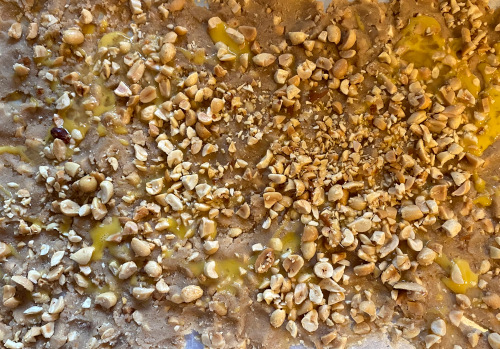
1 cup pecans or walnuts, chopped 
1 1/3 cups shredded coconut

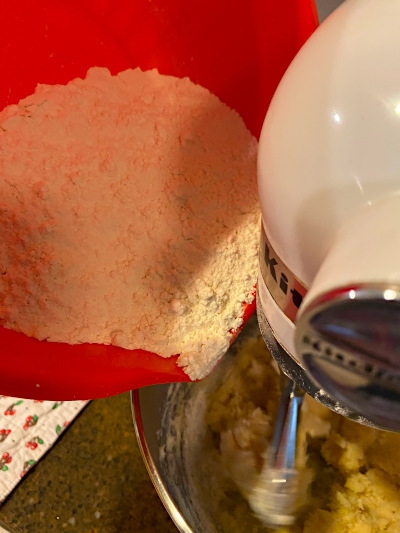
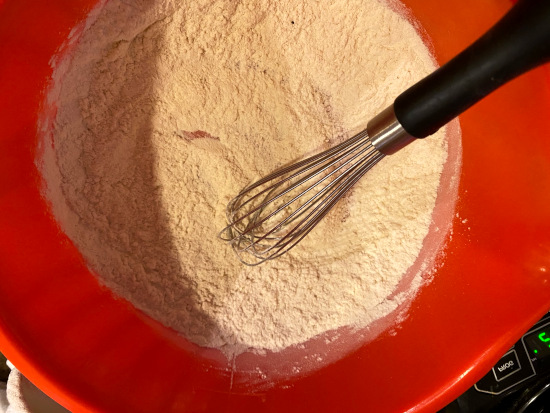
Sift together the flour, baking soda and salt and set aside.

Cream the butter. Add the vanilla and brown sugar. Mix well.


Add the egg and beat until smooth.


Gradually add the cocoa on low speed and then add the flour mixture.


Stir in the nuts and coconut.


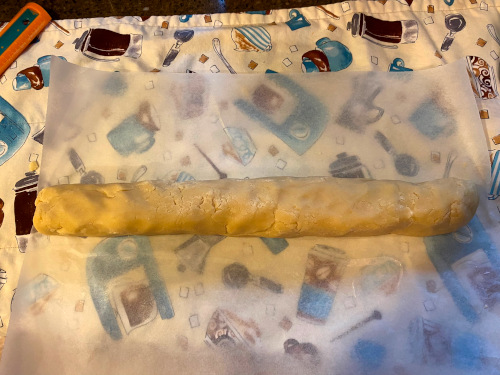
Turn the mixture out onto a lightly floured board (I think you could actually just go ahead and put it on the wax paper that you are going to wrap it in. It is not a sticky dough.) Form the dough into a ball, then shape it into a long roll, about 14 inches wide and 1 3/4 inches in diameter.


Wrap in wax paper (I also double wrap with plastic wrap if it is to stay in the freezer for a long time). Freeze the dough for several hours or longer.

When ready to bake, preheat the oven to 400. Line cookie sheets with foil.

Slice the dough with a serrated knife into 1/8 inch slices. Place them 1 inch apart on the foil.


Bake for 8-10 minutes or until they are semi-firm. Do not let them burn.

Transfer to a wire rack to cool. Store in an airtight container.


Wednesday, December 14, 2022

French Icebox Cookies

French Icebox Cookies (Source: Maida Heatter's Book of Great Desserts (Andrews & McMeel Publishing, 1999 ed.), pg. 231.

If you give baked goods as Christmas gifts, making icebox cookies is convenient as you can bake them when needed and not worry about them sitting around and going stale. I usually give a variety of cookies and treats to neighbors and friends and unless you want to kill yourself getting everything done at the same time, you can just pull these cookies out of the freezer and bake.

These cookies are crisp and buttery and easy to make with just a few ingredients. The dough is also a dream to work with. 

Slice the dough very thin and this recipe will make about 60 cookies.

1/2 lb. (2 sticks) butter
1 1/2 tsp. vanilla extract
1/4 tsp. almond extract
1/4 tsp. salt
1 cup sugar
2 1/2 cups sifted all-purpose flour
1 TBS. water


Cream the butter and mix in the vanilla and almond extracts, salt and sugar. 

Mix in the vanilla and almond extracts, salt and sugar.


Lower the speed of the mixer, add half of the flour and the water.

Add remaining flour until the mixture holds together, scraping down the sides of the mixer bowl as necessary.


Turn out the dough onto a piece of wax paper, measuring about 20 inches long. Shape the dough using the paper as your guide. Form it into an oblong shape about 2 inches in diameter and 15 inches long. Secure the wax paper and slide it onto a cookie sheet and freeze for 1/2 hour or more. If you are waiting to bake it in the future, wrap it again in plastic wrap.


When ready to bake, preheat the oven to 400.

Slice the dough about 1/4" thick with a sharp, thin knife. Place 1" apart on an unbuttered cookie sheet. Bake for 10 minutes or until the cookies are light brown around the edges. 

Transfer to baking racks and cool. Store in an airtight container.


Thursday, December 8, 2022

Dutch Chocolate Bars


Dutch Chocolate Bars  (Source: Maida Heatter's Cookies (Andrews & McMeel Publishing, 1997 ed.), pg. 128.

This is one of the most simple and fastest desserts I've ever made and it doesn't require a mixer. That is good when your mixer resides downstairs in the pantry (a fancy name I use for "storage room"). 

They are very tasty but it is important to keep them airtight so that the filling will remain moist. A wonderful treat to have with your morning coffee!

This recipe makes 16-18 bars (depending on how you cut them).

Bottom Layer

1/3 cup sifted all-purpose flour
1/4 tsp. baking soda
1/8 tsp. salt
1/2 cup light brown sugar, firmly packed
1 cup old-fashioned or quick-cooking oatmeal
1/2 cup pecans, finely chopped
5 1/3 TBS. (2 2/3 oz.) butter, melted

Preheat oven to 350 (use center rack).

Sift together the flour, baking soda and salt. Add the sugar and the oats and then the butter. 


Place the dough in an unbuttered 8" pan. Press the dough to form a layer.


Bake for 10 minutes.

Prepare the topping as the crust bakes.

Topping

2/3 cup sifted all-purpose flour
1/4 tsp. baking soda
1/4 tsp. salt
1 oz. unsweetened chocolate
4 TBS. butter
3/4 cup granulated sugar
1 egg
1 tsp. vanilla extract
2 TBS. milk

Sift together the flour, baking soda, salt and set aside.


Melt the chocolate and the butter in top of a double boiler. Stir and remove from the heat.


Mix in the sugar.


Add the egg.


Add the vanilla and the milk. Mix until smooth.


Add the flour mixture and mix.


Remove the crust from the oven when ready and spread the topping over it.


Bake for 25-30 minutes until tester comes out clean. Do not overbake (the chocolate should remain moist).

Cool completely in the pan.


Cut into bars or squares with a sharp knife.

Store airtight and do not let me dry out. They are best when fresh.


Monday, December 5, 2022

Sycamore Cookies


Sycamore Cookies 
 (Source: Maida Heatter's Cookies (Andrews & McMeel Publishing, 1997ed.), pg. 67.

These cookies were a mess (as Michael would say - a "I Maida Mess") and I expected them to be something to forget. However, they are quite delicious so perhaps they should be called a "Maida Redo"? They are delicately crispy and taste like a peanut butter cookie with peanuts.

Although a relatively simple recipe, the problems arise when spreading the dough in the pan and removing them. I would like to try it again with perhaps a parchment sling to remove it from the pan and maybe a smaller pan.

But here are the instructions, as written and the outcome.

1 cup salted peanuts
1 cup sifted all-purpose flour
1/4 tsp. baking soda
1/4 tsp. cinnamon
4 oz. (1 stick) unsalted butter
1 tsp. vanilla extract
1/2 cup dark brown sugar, firmly packed
1 egg, beaten

Preheat the oven to 325.

Butter a 10 1/2" x 15 1/2" jelly roll pan and place it in the freezer. This is to make it easier to spread the batter.

Chop the peanuts finely (I probably should have chopped the nuts more than I did but that did not affect the outcome).


Sift together the flour, baking soda and cinnamon. 


Beat the butter and add the vanilla and sugar. 


Mix in two tablespoons of the eggs...


Mix in the flour mixture...


and half of the nuts (reserving the remaining nuts).


Place large spoonfulls of the batter over the pan.


Use the back of a spoon to spread the batter (I found that using my fingertips worked better).


Spread the batter thin and it doesn't matter if there are skimpy areas.


Drizzle the remaining butter over the batter and spread it with a brush.


Sprinkle the remaining nuts over the batter.


Bake for 25 minutes. The top will be lightly brown and soft to the touch.


Let stand for 5 minutes and cut with a small knife into oblong sections. (I did not want to use a knife on my pan so I used an off-set spatula to slide underneath the batter and remove it. I then broke it apart. They were very crispy and I don't believe cutting would have been possible).

Store the cookies airtight.

Sunday, April 3, 2022

Light Rocky Roads


Light Rocky Roads 
(Source: Maida Heatter's Cookies (Andrews & McMeel Publishing, 1997 ed.), pg. 134.

A very easy and very quick recipe. I doubled it and made them in a 13" x 9" pan. I thought the crust should have been thicker (she says it makes a thin crust and it certainly does). I wanted to use pecans instead of walnuts but I didn't have enough on hand. I simply like pecans much better than walnuts.  Either is fine. 

I would advise you to line the pan with baking paper. The recipe does not specify this but I suspected that it would be hard to remove them neatly from the pan otherwise.

There is also a "Dark Rocky Roads" with a chocolate layer and glaze but I have not tried that one yet.

(Makes 18 bars)

1/4 cup sifted all-purpose flour
1/4 tsp baking powder
Pinch of salt
1 egg, lightly beaten
1/3 cup dark or light brown sugar, firmly packed
1/2 tsp. vanilla extract
1 TBSP unsalted butter, melted
1/2 cup walnuts or pecans, finely cut


Preheat the oven to 350. Use the lower third rack. Butter or spray an 8-inch pan and line with parchment paper.

Sift the flour, baking powder, salt and set aside. In another bowl, combine the egg, sugar, vanilla and butter. Add the flour mixture. Stir in the nuts. Spread the mixture into the pan and smooth out evenly.

Bake for 15 minutes or until the crust springs back when lightly pressed.

Topping

I cup miniature marshmallows
1/2 cup walnuts or pecans, coarsely chopped
1 cup semi-sweet chocolate chips


Have the topping ingredients ready so that they can be applied to the crust as soon as it comes out of the oven. Immediately cover the crust with a layer of marshmallows, then the nuts and the chocolate chips.

Place the pan back in the oven on the top rack and bake for only 2 or 3 minutes just until the chocolate is softened. Use the back of the spoon to spread the chocolate over the marshmallows.


Let it sit until it has reached room temperature. Chill in the refrigerator to set the chocolate.

Cut into squares with a sharp knife. Sprinkle with confectioners sugar if desired.