Tuesday, May 31, 2016

Dione's Chocolate Roll


Dione's Chocolate Roll Source: Maida Heatter's Cakes (Andrews & McMeel Publishing, 2011 ed.), pg. 76.

I had almost decided not to post this recipe because I had some major problems with it. However, it does taste wonderful! That said, I have made a lot of rolled cakes and this method is not one I would recommend. The directions say to bake the cake and remove it and cover with a damp cloth for 20 minutes to retain the moisture in the cake. This is where the problems began. The cake was soft to begin in and after I followed the directions as written, the cake was very mushy. The second blunder comes when the instructions say to dust it with cocoa powder and then invert it. Fortunately, I had the foresight to take this outside to the deck before attempting this. If you do this the way it is written, you and your kitchen will be covered with cocoa powder! I forged ahead, thinking that the cake was not entirely done (I think it was just moist from the disastrous wet towel method). As expected, the cake cracked badly when I rolled it. I had enough whipped cream icing to cover the eyesores. I refrigerated it and a few hours later, tried a piece and it was delicious.

I make a pumpkin roll every Thanksgiving and I have made various other rolled cakes. I always roll the cake once it is removed from the oven in a towel and let it cool completely. I then unroll the cake and apply the icing and roll it up again. I think that method would work better for this cake as well.

This recipe was one of the May picks for the Cake Slicers group on Facebook. For more of the recipes, see the links at the end of this post. 

Cake
8 oz. semisweet chocolate
1/3 cup boiling water
8 eggs, separated
1 cup sugar
Pinch of salt
1/4 cup unsweetened cocoa (preferably Dutch process)
Additional cocoa powder, if necessary

Preheat oven to 350. Line a 12 x 18 x 1 jelly-roll pan with foil. Butter the foil and set aside.

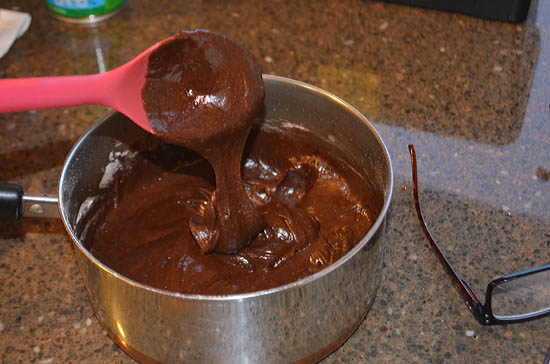
Break up the chocolate and place it and the boiling water in the top of a double boiler over low heat. Stir occasionally until the chocolate has melted and is smooth.

Place the egg yolks in a small bowl and add 3/4 cup of the sugar (reserving 1/4 cup). Beat at high speed for about 5 minutes until they are almost white.

In a larger bowl, fold the cooled chocolate and the yolk mixture until smooth. Set aside.

Place the egg whites in a clean mixer bowl and heat on high until the whites hold a soft shape. Fold about 1/3 of whites into the chocolate mixture. Add another third and fold briefly. Add the remaining whites and carefully fold until no whites show.

Turn into the prepared pan and bake for about 17 minutes.

Wet a large linen or cotton towel and wring dry. Place it over the cake in the pan when it is removed from the oven. (Read my notes about this in the introductory paragraph). Let it set for 20 minutes.

Dust the cake with the cocoa powder. Invert the cake and carefully remove the foil. Cover the cake with plastic wrap or wax paper and let it cool completely.


Whipped Cream Filling

1 1/2 cups whipping cream
3 TBS. confectioners sugar
1 tsp. vanilla extract

In a chilled bowl with chilled beaters, whip the cream with the sugar and vanilla until the cream is firm.

Uncover the cake and place the cream over it with a narrow spatula.

Use the wax paper to help you roll the cake. You can dust with more cocoa powder or frost it with remaining whipped cream.

Monday, April 25, 2016

Haleakala Cake


Haleakala Cake Source: Maida Heatter's Cakes (Andrews & McMeel Publishing, 2011 ed.), pg. 119.

I don't think my cake turned out as dramatic as it was described in the book. For one thing, I made a mistake at the grocery store and only bought one can of crushed pineapple instead of two. So, I decided to half the recipe for the filling. The cake turned out fine, it was just not as tall as it would have been with the extra filling. It tasted wonderful and reminded me of an old-fashioned coconut cake.

The icing recipe made an insane amount of icing! I ended up with way too much to use on the cake. I did save it so perhaps I can use it for another project (it cannot be frozen however).


This cake was very easy to make! I thought the pineapple filling was an adequate amount. I believe that I would cut the icing recipe in half the next time. So despite the fact that my cake looked more like a sheetcake instead of a celebration cake, it was a hit.


Pineapple Filling
2 1.4 oz cans crushed pineapple
2 TBS lemon juice
2 TBS plus 1 1/2 tsp cornstarch
2 TBS sugar
1/8 tsp salt
1 tsp vanilla extract

Drain the pineapple, reserving the juice, and set aside. Add the lemon juice to the pineapple juice.

In a large saucepan, stir together the cornstarch, sugar and salt. Gradually add the pineapple juice and mix until smooth. Place the pan over medium heat and stir until the mixture comes to a boil. Reduce the heat and let it simmer for about 1 1/2 minutes.  Remove from the heat and add the vanilla. If you wish, add 6-8 drops of the food coloring. Refrigerate until ready to use (you can make this days ahead).
Yellow food coloring (optional)

Cake

2 cups sifted all-purpose flour
3 1/2 tsp baking powder
1 tsp salt
1/2 cup butter (1 stick) (softened)
1 tsp vanilla extract
1 1/2 cups sugar
1 cup milk
4 egg whites


Preheat oven to 350. Line 2 9-inch pans with wax or parchment paper. Spray or butter the pans and the paper. Dust with flour and set the pans aside.

Sift the flour, baking powder and salt together and set aside.

In a large mixer bowl, beat the butter until it is smooth.  Add the vanilla and sugar, mixing well. On low speed, add the flour mixture alternately in three additions along with the milk in two additions.  Beat on high speed for 10-15 seconds. Add the egg whites (unbeaten) on high speed for about 2 minutes.

Spread the mixture evenly between the pans. Bake 20-30 minutes until the tops are lightly browned 
and the top of the cake bounces back when lightly pressed with your fingertip.  Remove from the oven, slide a knife along the edges and allow to cool for about 5 minutes before turning them out onto a cooling rack. Allow to cool completely.

Marshmallow Icing

1 1/2 cups sugar
2/3 tsp cream of tartar
2/3 cup water
4-5 egg whites (2/3 cup)

1 1/4 tsp vanilla extract
1/2 cup shredded coconut (for sprinkling over the top)


Place the sugar, cream of tartar and water in a 6-cup saucepan. Stir with a wooden spoon until the mixture comes to a boil and the sugar is dissolved. Cover the pot with a lid and allow it to boil for 3 minutes. Uncover and insert a candy thermometer. Continue to boil until the temperature reaches 242 degrees.

Add the salt to the egg whites in a clean, large mixer bowl and beat until the whites are stiff. When the sugar syrup is ready, pour it into the egg whites with the mixer on high speed. Continue to beat at high speed for about 5 minutes until the mixture has a marshmallow-like consistency. Mix in the vanilla.


Before assembling the cake, place pieces of paper around the bottom to prevent a mess. Spread half of the pineapple mixture over the first layer. Place the second layer over the first and spread the remaining pineapple mixture on top.


Apply the icing around the sides of the cake as well as the top. Sprinkle the coconut over the top. When finished, carefully remove the pieces of paper. The cake can be served at room temperature. Refrigerate any leftovers.


Yum

Sunday, March 20, 2016

Chocolate Brownie Cheesecake


Chocolate Brownie Cheesecake Source: Maida Heatter's Cakes (Andrews & McMeel Publishing, 2011 ed.), pg. 146.

After finally getting all my pots and pans organized and the new kitchen in order, I am finally ready to do some baking.  There have been lots of rainy days and the weather has been perfect for staying inside. Regardless of what you may have heard about the Pacific Northwest, there have been some nice sunny days as well! 

In addition to getting used to where all my equipment is located (I am still not totally comfortable with where everything is yet), I also now have a gas stove. We had an electric stove at our former house in Alabama. I have not really had a problem with it though and it seems to perform just like the old one.

We had our friends in Portland over a few nights ago and I decided to make a cheesecake to celebrate our move and our new home. I chose the Chocolate Brownie Cheesecake because it sounded delicious and it is one of the choices in the baking group that I mentioned in the previous post.

This is a recipe that Maida Heatter devised after she told her husband she was making Chocolate Cheesecake Brownies and he said "Why not Chocolate Brownie Cheesecake"? 

It is very good! I forgot to buy nuts so I omitted those from the brownies and it was fine. 


First, make the brownies:

1 cup sifted all-purpose flour
3 TBS. unsweetened cocoa powder
4 oz. (1 stick) unsalted butter
2 oz. unsweetened chocolate
1 tsp. powdered instant coffee
1/2 tsp. vanilla extract
1/4 tsp. almond extract
Pinch of salt
1 cup sugar
2 eggs
3 1/2 oz. (1 cup) walnuts


Preheat oven to 350. Line a 8-inch square pan with foil. Melt a tablespoon of butter and brush it on the foil.
Sift together the flour and cocoa.

In a heavy saucepan over low heat, melt the chocolate and the butter, stirring occasionally. Stir in the coffee, vanilla and salt. Add the sugar and the eggs (one at a time).
 

Add the sifted ingredients to the melted chocolate mixture. Stir in the nuts.
Spread the mixture into the prepared pan. Bake for 20-25 minutes. Remove from the oven and let cool. Then place the pan in the freezer until the cake is very firm.
Remove the cake from the pan after it has frozen completely. Cut the cake into quarters - set aside one quarter (you will not be using it) and cut the remaining 3 quarters into small cubes. Return to the freezer.

The Cheesecake:

2 lbs. Philadelphia cream cheese (room temperature)
1 tsp. vanilla extract
Pinch of salt
1 1/2 cups sugar
4 eggs
1/3 cup graham cracker crumbs

Preheat oven to 350. Butter an 8x3 inch one-piece cheesecake pan. Wrap the pan with aluminum foil.

Beat the cream cheese until it is smooth. Add the vanilla, salt and sugar. Beat until thoroughly mixed. Add the eggs, one at a time. Mix only until incorporated.

Pour a little of the mixture into the pan, just enough to cover about 1/2 inch on the bottom.

Remove the brownie chunks from the freezer and gently gold them to the remaining cream cheese mixture.

Add the remaining mixture to the pan and smooth the top. Sit the cheesecake pan into a larger pan. Add about 1 1/2 inches of hot water to the larger pan.
Bake for 75 to 90 minutes. During the baking process, the top of the cake will rise and turn slightly brown. The hardest part to baking a cheesecake is judging whether or not it is done. One method is to jiggle the pan and observe the middle. It should jiggle slightly. The best way to do it is to use a thermometer. The internal temperature should be 160. Cool on a cooling rack and let it stand for 2-3 hours until the bottom of the pan is completely cool. Cover with plastic wrap and refrigerate.
For the crust, Maida employs her usual method of removing the cake from the pan, flipping it, and applying dry crumbs to the bottom. Trust me on this - it is a mess and a terrible way to do it. I always make the crust by the modern method (mixing crumbs with butter and pre-baking). However, a confession. This time, I forgot to do that and ended up serving the cake without any crust at all. It was fine without it.


Thursday, February 25, 2016

An update...

It has been over five months since my last post and I am still on the planet! There have been quite a number of changes in my life - I retired and moved cross-country from Alabama to Washington state. It has been a longtime dream to live in the Pacific Northwest and I can't believe that we are actually here. Things are still rather hectic but are slowly getting back to normal. I hope to continue baking soon and update the blog as well. In the meantime, here is a link to a wonderful blog where readers are currently baking recipes from Maida Heatter's books. Check it out at http://emilycookingforays.blogspot.my/2016/02/the-cake-slice-bakers-february-2016.html

Friday, September 4, 2015

Chocolate Chip Honey Cookies


Chocolate Chip Honey Cookies
Source: Maida Heatter's Book of Great Chocolate Desserts (Andrews & McMeel Publishing, 2006 ed.), pg. 117.

This is a good, simple cookie recipe. I do not recall using honey as an ingredient in cookies before. The honey taste isn't that noticeable. The cookies have a slightly grainy quality. I would have preferred more chocolate chips. They do not have a very strong chocolate flavor. I thought these were okay, but I have tried other chocolate chip cookies recipes of hers that I like better.

1 1/4 cups sifted all-purpose flour
1/2 tsp. baking soda
1/2 tsp. salt
1/4 lb. (1 stick) sweet butter
1/2 tsp. vanilla extract
1/2 cup honey
1 egg
1 cup pecans or walnuts, chopped 
1 cup semisweet chocolate chips

Preheat the oven to 375. Line cookie sheets with foil.

Sift together the flour, baking soda and salt and set aside. Cream the butter.
 
Mix in the honey and vanilla. Add the egg.

 
Add the sifted dry ingredients.

 
Use a tablespon or small ice-cream scoop to form the cookies. Place them about 2 inches apart on the cookie sheets.

Bake for about 13-15 minutes, reversing the sheets half-way through. The cookies should be slightly colored and spring back when lightly touched. Transfer to the a cooling rack. Store in an airtight container.