Wednesday, November 28, 2018

Cranberry Pumpkin Cake


Cranberry Pumpkin Cake
Source: Maida Heatter's Best Dessert Book Ever (Andrews & McMeel Publishing, 1997 ed.), pg. 125.

Maida Heatter has several recipes that are good for the holidays and I have made several of them already. I plan to post a list of all of the holiday desserts I have made and will do that soon.

Here is another good one that is so easy. This is a dark and dense cake that is very moist (don't overbake it). Confession - I get so paranoid about overbaking cakes that I always start checking before the allowed time and sometimes take them out a little early. The cake will always continue to bake especially when left in the pan for a while. Of course, this depends on the type of cake but after you have done a lot of baking, your instinct will kick in. 

I used bagged cranberries that had not been frozen. The cranberries are tart and provide a kick when paired with the delicate and spicy flavors of the cake. The nuts and the berries do not sink.

I froze half of this cake and plan to take it to a meeting this weekend. 

6 oz. (1 1/2 cups) walnuts
12 oz. (2 cups) fresh or frozen cranberries
3 cups sifted unbleached flour
2 tsp. baking soda
2 tsp. baking powder
3 tsp. cinnamon
1 tsp. salt
1/2 tsp. ginger
1/2 tsp. black pepper
1/4 tsp. cloves
1/4 tsp. nutmeg
1/4 tsp. allspice
2 cups pumpkin
2 cups granulated sugar
1 1/4 cups vegetable oil (or canola, safflower, corn)
4 large eggs

Preheat oven to 350. Butter a 10x4 1/4 inch tube pan with an 8 cup capacity (I used a Bundt pan for this). Dust with chocolate bread crumbs (bread crumbs with cocoa powder mixed in).

Place the walnuts in a large pan and bake for 10 minutes. Allow them to cool and break into small pieces.

If using fresh cranberries. wash and dry them.

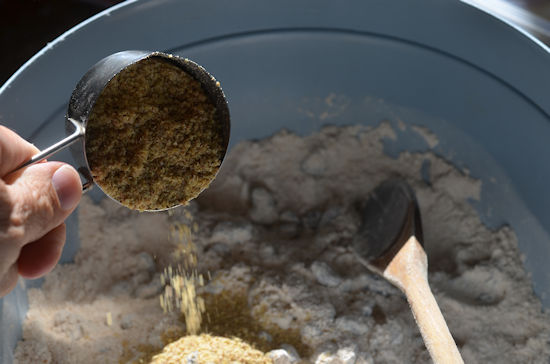
Sift together the flour, baking soda, baking powder, cinnamon, salt, ginger, pepper, cloves, nutmeg and allspice. 

Beat the pumpkin, sugar and oil to mix. Add the eggs, one at a time, until mixed. Lower the speed of the mixer and gradually add the sifted dry ingredients. Beat only until smooth and fold in the nuts and the cranberries.

Turn into pan and smooth the top. Bake for 55 minutes to 1 hour and 10 minutes (if the cranberries are frozen, it may take longer). The cake is done when a tester comes out clean from the deepest part of the cake. 

Cool in the pan for 15-20 minutes and turn out onto a wire rack to cool completely.


Friday, November 16, 2018

Chocolate Cupcakes


Chocolate Cupcakes
Source: Maida Heatter's Book of Great Chocolate Desserts (Andrews & McMeel Publishing, 2006 ed.), pg. 284.

I wanted a quick recipe for a meeting I was attending and I wanted to try out a new muffin pan. This cupcake recipe is from Maida Heatter's chocolate book. She notes that this is the recipe she usually uses when asked to bring something to a bake sale.

You can make these with cupcake liners like I did (the fastest method!) or you can grease the pans.

The recipe makes 24 cupcakes although I came up short. I probably added too much batter to each cup. The instructions say to fill them 2/3 full.

The cupcakes are dipped in a glossy icing which makes it easy. I do think that they might be more attractive if the icing was piped on. I suppose it depends on how much time you have!

2 cups sifted all-purpose flour
1 tsp. baking soda
1/4 tsp. salt
1/2 cup unsweetened cocoa powder
5 1/3 oz. (10 2/3 TBS) sweet butter
1 tsp. vanilla extract
1 1/2 cups granulated sugar
3 large eggs
1 cup milk

Preheat the oven to 350. Butter and flour two cupcake pans or line them with liner papers.

Sift the flour, baking soda, salt and cocoa and set aside. 

Beat the butter until softened and gradually add the vanilla extract and sugar. 

Add the eggs one at a time, mixing well. Scrape the sides of the bowl and mix well.
Alternately add the cocoa with...
the milk in three additions. Beat only until smooth. Do not overbeat.
The batter will be a little thick and grainy. 
Fill the cupcake forms with batter, filling about 2/3 full. 
You do not have to smooth the tops.
Bake for 20-25 minutes until the tops spring back when pressed. Do not overbake. Cool completely before icing.
The icing should be at room temperature before using.
For faster cooling (as well as easier dipping), you can place it in a shallow bowl or plate. Dip each cooled cupcake into the icing. This can be done several times.

Monday, November 12, 2018

Delicious Bran Loaf


Delicious Bran Loaf  (Source: Maida Heatter's Cakes (Andrews & McMeel Publishing, 2011 ed., pg. 265).

Another "healthy" recipe, this one is on the next page following Health Food Raisin Bread. I think I like this one better but they are both good. I like the addition of dates to this recipe and it makes the cake (or bread) more moist. This isn't sweet and it makes a good bread for breakfast or a coffee break. 

I used Kellogg's All-Bran cereal for the recipe (and Maida Heatter said that she did too) and I did not include the sunflower or pumpkin seeds, which are optional.

1 cup 100% bran cereal
2/3 cup raisins
1/2 cup dark or light molasses
2 TBS unsalted butter, cut into small pieces
3/4 cup boiling water
1 egg, slightly beaten
1 cup walnuts or pecans in large pieces
1/2 cup dates, cut into pieces
Optional: 1/4 cup unsalted sunflower or pumpkin seeds
1/2 cup unsifted all-purpose whole wheat flour
1/2 cup unsifted all-purpose white flour
1/2 tsp baking soda
1/2 tsp salt
1/2 tsp ginger
1/2 tsp cinnamon

Preheat oven to 350 degrees. Butter an 8 1/2 x 4 1/2 x 2 3/4 inch loaf pan and dust it with wheat germ, quick-cooking oatmeal or fine, dry bread crumbs. (I used wheat germ)

Place the bran, raisins, molasses and butter in a large mixing bowl.

Add the boiling water and stir until the butter has melted.
Add the egg, nuts, dates and optional seeds. 
Sift the two flours, baking soda, salt, ginger and cinnamon over the mixture in the bowl.

Stir until just mixed.
Transfer the mixture to the prepared pan and smooth the top. Bake for 35-40 minutes, until the top is barely firm to the touch.
Cool in the pan for 10-15 minutes and then transfer to a cooling rack. 


Tuesday, October 23, 2018

Health Food Raisin Bread


Health Food Raisin Bread (Source: Maida Heatter's Cakes (Andrews & McMeel Publishing, 2011 ed., pg. 264).

I love to have a sweet bread or cake with my morning coffee but I have been trying to limit my sugar intake. That is hard to do with Maida Heatter's recipes but this one recently caught my eye. There is no sugar in it and it is sweetened with honey and molasses. I really like it, especially with cream cheese. She has some similar recipes of this nature that I plan to try soon. 


I do not normally use that much whole wheat flour so I store it in our old refrigerator in the garage. I used Bob's Red Mill stone ground wheat flour for this. Wheat germ is another item I store in the refrigerator. I did not toast this for the recipe but the next time I will try doing that. For the molasses, I happened to have some Brer Rabbit molasses in the cabinet that I used earlier in the year for another recipe.


A 6-cup capacity loaf pan is needed for the recipe. I had a long, narrow pan (measuring about 12" x 4.5") stored away that I just started using and I love it. It bakes faster than wider pans so keep in mind that pan size can affect baking times. This recipes specifies 50 minutes but mine was done in 40.

This is a fast and easy to make! I did not even use a mixer for this.


2 cups unsifted all-purpose whole wheat flour

1/4 cup unsifted all-purpose white flour
3/4 tsp. salt
1 tsp. baking soda
1 1/4 cups (6 oz.) raisins (dark or light)
1/4 cup wheat germ, untoasted or toasted
1/2 cup milk
1 cup buttermilk
1/4 cup honey
1/4 cup dark or light molasses

Preheat the oven to 350. Butter a 6-cup capacity loaf pan and dust it with wheat germ (you can use toasted wheat germ as well).

Place both whole wheat and all-purpose flour in a mixing bowl and whisk together. Add the baking powder through a fine strainer.


Stir in the raisins, being sure to separate them and make sure they are all floured.


Stir in the wheat germ.


Mix together the milk, buttermilk, honey and molasses.


Add the milk mixture to the batter and mix well with a wooden spoon.


Place the batter into the pan, smooth the top and form a slight trench down the middle of the top with a spoon. 


Bake for 40 - 50 minutes until the top feels semi-firm and a tester comes out clean. Cool in the pan for at least 15 minutes before turning out and allowing to cool completely on a wire rack.

After cooling, wrap the bread well. It dries out quickly.


Wednesday, October 3, 2018

Chocolate Fondant Cookies


Chocolate Fondant Cookies
Source: Maida Heatter's Brand-New Book of Great Cookies (Random House, 1995 ed.), pg. 138.

Maida describes these cookies as "plain" and that they are but in my opinion, the addition of chocolate brings anything up to another level! Especially milk chocolate (I used Hershey bars). The batter was sinfully delicious and I could have stood there and ate the entire bowl. The cookies are good, nothing extraordinary, but you find yourself going back for more...


7 TBS. unsalted butter
3/4 cup sifted unbleached flour
1 tsp. baking powder
Pinch of salt
1/3 cup unsweetened cocoa powder
1/3 cup sugar
7 oz. milk chocolate
2 large eggs
Optional: Confectioners sugar (to sprinkle on top of cookies)

Preheat oven to 350. Line cookie sheets with parchment paper or foil.

Cut the butter into small pieces and set aside.

In a food processor, add the flour, baking powder, salt, cocoa and sugar and pulse a few times to mix. Break the chocolate into small pieces and mix for about 20 seconds. Add the butter and process for 15-20 seconds until the mixture holds together. With the processor running, add the eggs through the feed tube and mix well. Transfer mixture to a small bowl.

Form the dough into tablespoon sized balls. Place them on a piece of foil a few inches apart. You will have to wet your hands throughout the process so it is good to do this next to the sink. 
Place the formed balls on the prepared cookie sheet about 3 inches apart. Bake for 12-15 minutes. The dough will barely spring back when pressed when they are ready. Do not overbake.
The cookies will expand a bit during baking. Transfer them to a wire rack with a wide spatula. Let them cool completely before storing in an airtight container.